- Contents
- Index
- Search

Show results that include all search words
Posting Ledgers to GL
Utilities > Ledger Posting > Post Ledgers to GL
All three source ledgers (Debtors, Creditors and Stock) can be posted to the General Ledger at the same time. One batch is created for each ledger. Batches are created on combination of Period and ledger, i.e. one for each period and ledger combination. The Description field for the batch indicates the ledger for which the batch has been created.
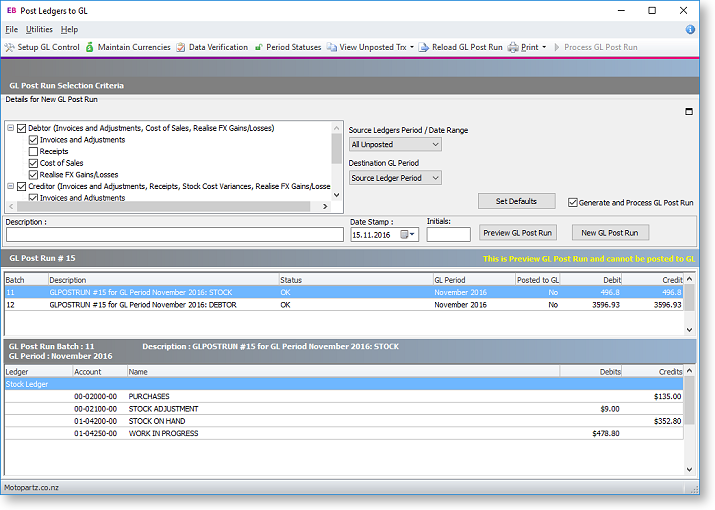
Toolbar buttons are available to access the setup screens for GL Control Accounts, Currencies and Period Statuses, as well as the Data Verification utility. These options are also available in the Utilities menu.
You can view transactions that have not yet been posted by selecting an option from the View Unposted Tx button menu.
![]()
To post ledgers to the GL:
-
Select what information to post. Choose from:
-
Debtors Invoices and Adjustments
-
Debtors Receipts
-
Debtors Cost of Sales
-
Debtors Realise FX Gains/Losses
-
Creditors Invoices and Adjustments
-
Creditors Receipts
-
Creditors Stock Cost Variances
-
Creditors Realise FX Gains/Losses
-
Stock (if Exo Job Costing is installed, this option becomes "Stock and Work in Progress")
Note: The availability and default settings for these options are determined by the profile settings Allowed ledgers to post and Default status of the ledgers in Post ledgers to GL screen.
-
-
Specify the period or dated range you want to extract data from. Choose from:
-
All Unposted - All unposted transactions.
-
Prior to Current Period - Everything except the current financial period.
-
Selected Period Range - Selecting this option lets you specify a From and To period to determine the source range.
-
Selected Date Range - Selecting this option lets you specify From and To dates to determine the date range.
-
-
Select the destination GL period. Choose from:
-
Source Ledger Period - With this mode each source ledger period will create a distinct General Ledger batch in the matching GL period. Where multiple periods exist in the selected set of source data, multiple GL batches will be produced.
-
Custom GL Period - Selecting this option lets you specify a specific GL period to receive all selected transactions. In this mode only one GL batch will be created even if multiple periods are included in the source ledger data selected.
-
-
Enter post run details:
-
The Date Stamp you want to use to date the GL transactions being posted
-
The Initials of the person performing the post run
-
A Description of the post run.
-
-
Click the New GL Post Run button. This creates suspended batches and marks the source ledger transactions as posted. You are given the option of printing a report on the post run. If the Generate and Process GL Post Run option is ticked, the post run will be processed automatically.
Note: Instead of clicking New GL Post Run, you can click New Preview GL Post Run to extracts and views GL data without marking the source transactions as posted. This is useful for first GL post runs, particularly during implementation. This gives you the opportunity to correct data in the source ledgers and/or ensure system setup (such as GL accounts on stock items etc.) is correct.
-
The batch(es) appear on the Post Ledgers to GL window. Review the transactions listed and ensure the total debit and total credit values balance. From here you can edit the batch if necessary by right-clicking on it (some options are not available if the batch was processed automatically):
-
Right-click and select Print Batch to print a report on a batch.
-
Right-click and select Edit Batch > Description to edit the batch's description.
-
Right-click and select Edit Batch > General Ledger Period to change the General Ledger period that the batch will post to.
-
Right-click and select Edit Batch > Fix Imbalance to create a rounding line in the batch for the amount of the imbalance, subject to the threshold you specified by the profile setting Post Ledgers to GL Maximum. For amounts less than the threshold, the rounding line is automatically created; for amounts greater than the threshold, you are prompted for your password if you are supervisor, or if you are not a supervisor, a list of supervisors is displayed, for a supervisor to enter their password.
-
Right-click and select Validate Batch to check the batch for imbalances.
-
Right-click and select Reverse Batch to reverse the batch transactions. For pending batches, this reverts all of the source transactions from the batch to their original state. For posted batches, this takes all the source transactions from the batch and reverses the Debits and Credits.
Note: To enable the Edit Batch > Transactions option, use the Drop Down Menu Designer to add the parameter "+EGL" to the Post Ledgers to GL menu function.
You can also view additional information about the transactions in the batch by right-clicking on the transactions in the bottom section of the Post Ledgers to GL window:
-
Right-click and select View GL Account to open the General Ledger Account Details window for the relevant account.
-
Right-click and select View Pre Posted Transactions > Selected Account to display the showing the pre-journals that will be posted for the account that was right-clicked on.
-
Right-click and select View Pre Posted Transactions > All Accounts to display the showing a consolidated view the pre-journals for all accounts in the grid.
-
-
If the Generate and Process GL Post Run option is not ticked, click Process GL Post Run to post all batches to the General Ledger.
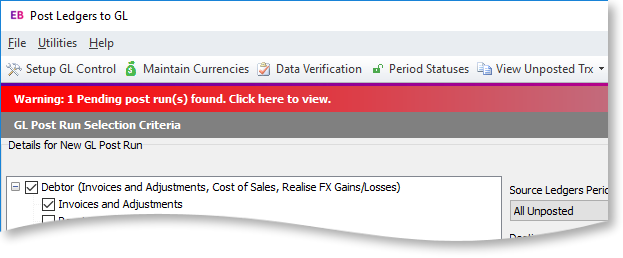
If you close the Post Ledgers to GL window without processing the GL post run, the next time you open it you can click Reload GL Post Run to re-open any pending post runs. If there are any pending post runs, a warning message will appear at the top of the window:
Posting Ledgers from the Command Line
The Post Ledgers to GL function can now be run from the command line, allowing you to process the default ledger posting in scheduled, automated unattended mode out of hours. To run the posting process from the command line, run Exonet.exe with the /POST_LEDGERS flag, i.e.:
Exonet.exe <database> <username> <password> /POST_LEDGERS
When run from the command line, the ledger posting process uses the following settings:
- Source Ledgers Period: All Unposted
- Destination GL Period: Source Ledger Period
- Date Stamp: The date that would normally appear on the Post Ledgers to GL window (usually today’s date)
- Initials: ATO
All of the profile settings that can normally be used to control ledger posting apply when posting from the command line.
When the ledger posting process is run from the Post Ledgers to GL window, the user is prompted to copy any invalid GL accounts to the clipboard; when running from the command line, invalid accounts are sent to the event log.
When run from the command line, the process does not prompt you to print the GL Post Run Report once the process is complete.