
Preparation for the MYOB Acumatica Installation: Implementation Activity
In this implementation activity, you will learn how to enable the required Internet Information Services (IIS) web server features and validate the configuration of IIS. This will prepare you to install the server component of MYOB Acumatica.
Story
Suppose that you are the system administrator of the SweetLife Fruits & Jams company, and you need to verify the system environment prior to installing MYOB Acumatica.
Process Overview
In this activity, you will do the following:
- Enable the required IIS web server features
- Verify the configuration of the IIS
Step 1: Enabling the IIS Management Console Feature
To enable the IIS Management Console feature, do the following:
- On the taskbar, click Start to open the Start menu, which contains all your apps, settings, and files.
- On the Start menu, type Windows Features.
- Click Turn Windows features on or off. The Windows Features dialog box opens.
- Go to .
- Select the IIS Management Console check box, as shown in
the following screenshot.Tip:If the check box is already selected, go to Step 2.
Figure 1. The IIS Management Console feature 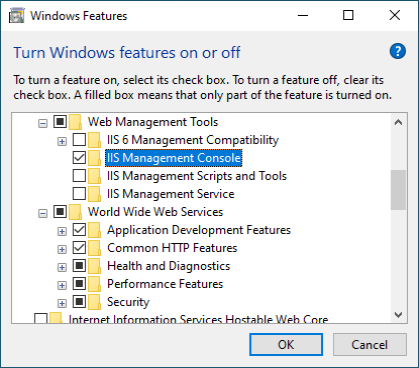
Step 2: Enabling World Wide Web Services Features
To enable various features that are included in the World Wide Web Services group of features, do the following:
- While you are still viewing the Windows Features dialog box, go to .
- Select the following check boxes (as shown in the screenshot below):
- .NET Extensibility 4.8
- ASP.NET 4.8
- ISAPI Extensions
- ISAPI Filters
- WebSocket Protocol
Figure 2. Enabling of the Application Development Features 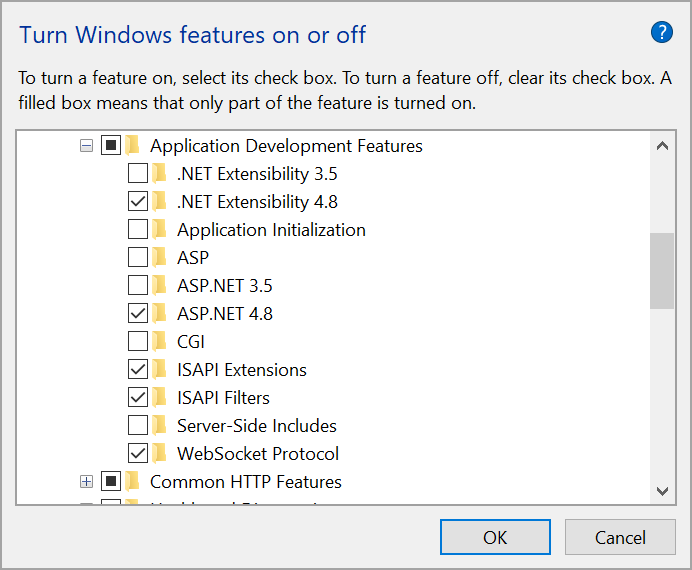
- Go to .
- Select the following check boxes (as shown in the screenshot below):
- Default Document
- Static Content
Figure 3. Enabling of the Common HTTP Features 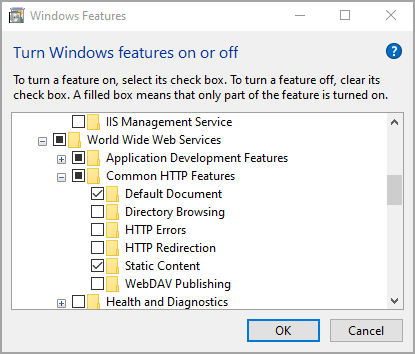
- Go to .
- Select the following check boxes (as shown in the screenshot below):
- Dynamic Content Compression
- Static Content Compression
Figure 4. Enabling of the Performance Features 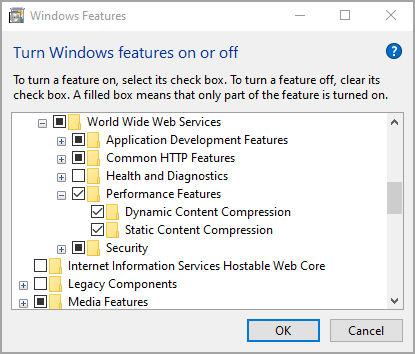
- Go to .
- Select the Request Filtering check box (as shown in the
following screenshot).
Figure 5. Enabling of the Request Filtering feature 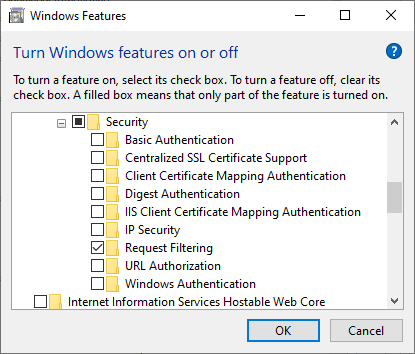
- Click OK.Tip:If you have turned on some features, Windows shows an informational message.
Step 3: Configuring Internet Information Services
To configure Internet Information Services, do the following:
- On the taskbar, click Start to open the Start menu and click search for Internet Information Services (IIS) Manager.
- In the left Connections pane, click Application Pools.
- In the middle pane, in the list of available application pools on the server, right-click the DefaultAppPool application pool, which you will use on your website, and select Basic Settings.
- In the Edit Application Pool dialog box, which opens,
make sure that the following settings are specified, as shown in the following
screenshot:
- .NET CLR version: A version configured for .NET
Version 4.8Note:The version number of the .NET Framework does not necessarily correspond to the version number of the CLR it includes. .NET Framework version 4.8 includes CLR Version 4.
- Managed pipeline mode: Integrated
- Start application pool immediately: Selected
Figure 6. The settings of the default application pool 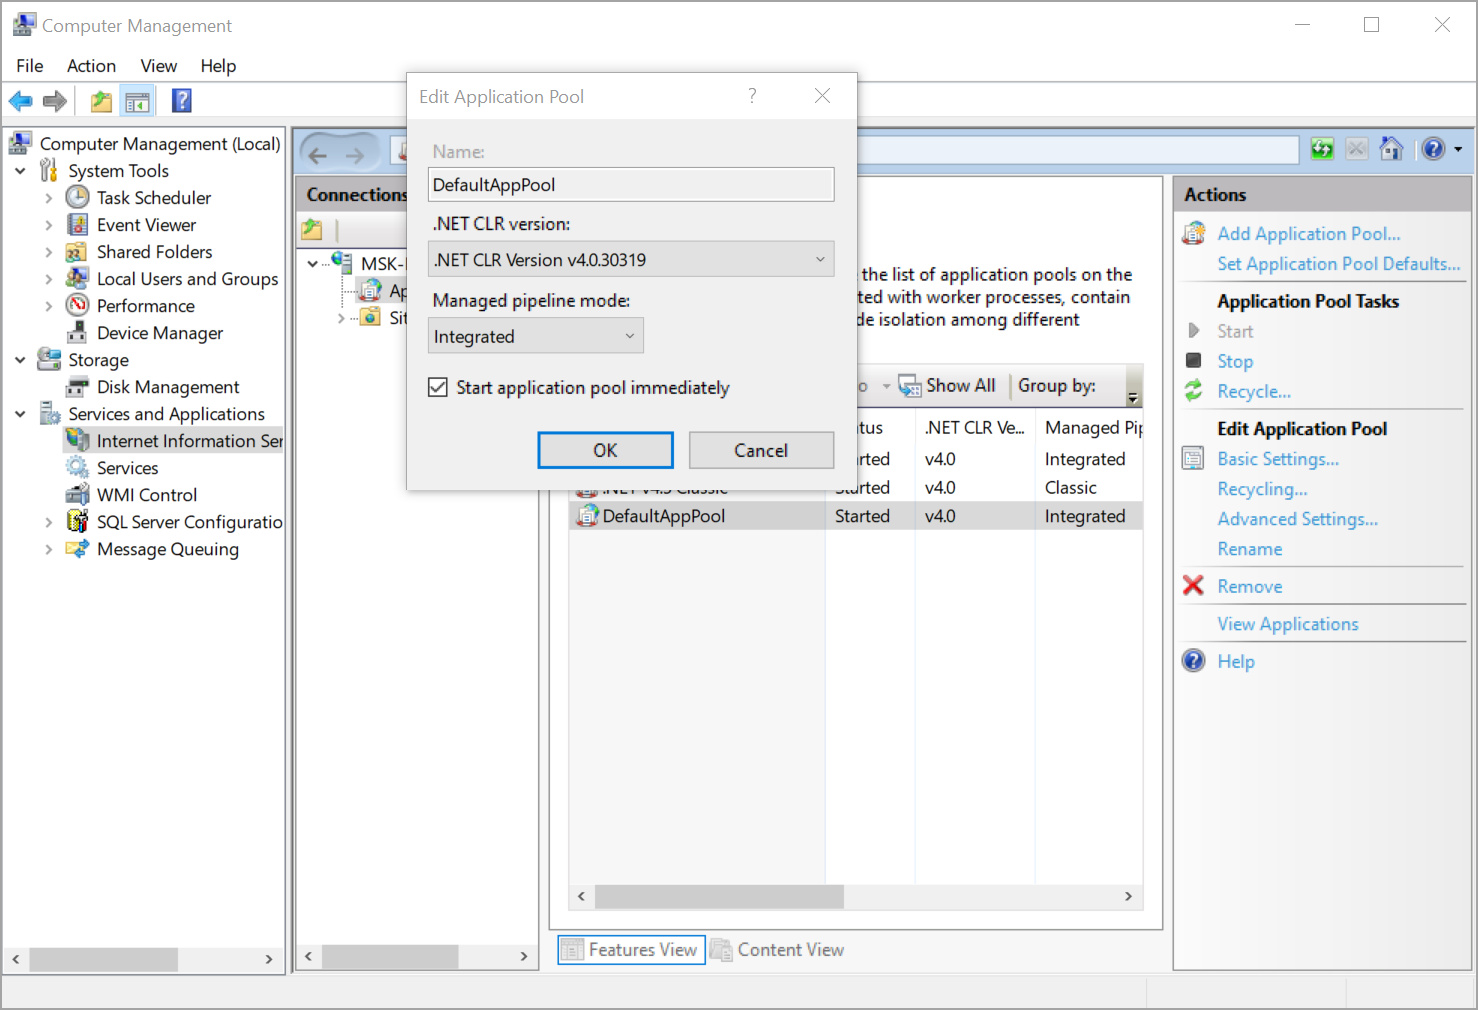
Important:We generally recommend that you use a separate application pool for the MYOB Acumatica production instance. - .NET CLR version: A version configured for .NET
Version 4.8
- Click OK to close the dialog box.
- While the DefaultAppPool application pool is selected in the middle pane, in the right Actions pane, click Advanced Settings.
- In the Advanced Settings dialog box, which opens, make
sure that False is selected as the value of the Enable 32-Bit
Applications setting (as shown in the following screenshot).
Figure 7. Advanced Settings of the DefaultAppPool 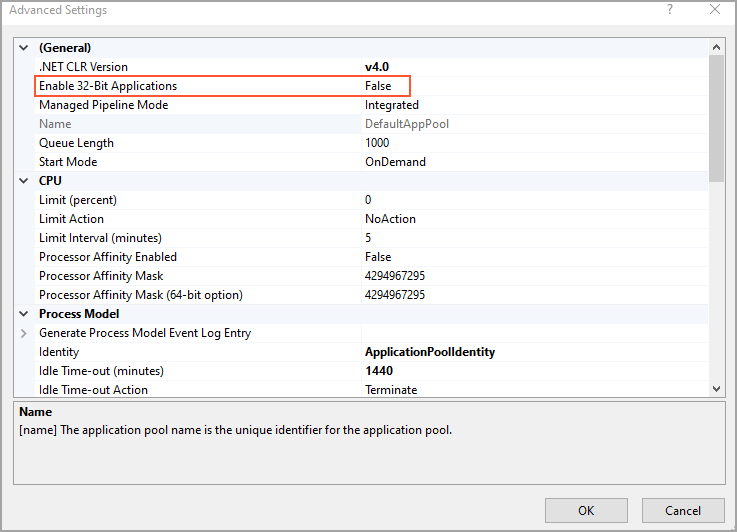
- Click OK to close the dialog box.
You have verified the Internet Information Services (IIS) configuration and can proceed to installing MYOB Acumatica.