Workflow Creation: Pages for Managing Workflows
This topic describes the primary pages you will use when you are developing a workflow or managing all of the workflows of a particular form, which is referred to as a screen in the Customization Project Editor.
You can add a workflow only if the screen of the workflow has been added to the list of customized screens on the Customized Screens page.
Primary Pages for Workflow Creation and Editing
For any screen that has been added to the Customized Screens page, you can use the Workflows page to view the workflows and their general settings. (The table on the page is empty if no workflows have been defined for the screen.) To open this page, in the navigation pane of the Customization Project Editor, you click Workflows under the screen ID.
You can click Add Workflow on the page toolbar, which opens the Workflow (Tree View) page. This page, which is sometimes called the Workflow Editor, is the primary page that you will use when you are developing or modifying a workflow. By clicking Diagram View on the page toolbar, you can work with the Workflow (Diagram View) page. The diagram view is also referred to as the Workflow Visual Editor.
To use the Workflow (Tree View) page for an existing workflow, you can click the link in the Workflow Name column of the Workflows page. You can also click the workflow name in the navigation pane under Workflows for the screen you are modifying.
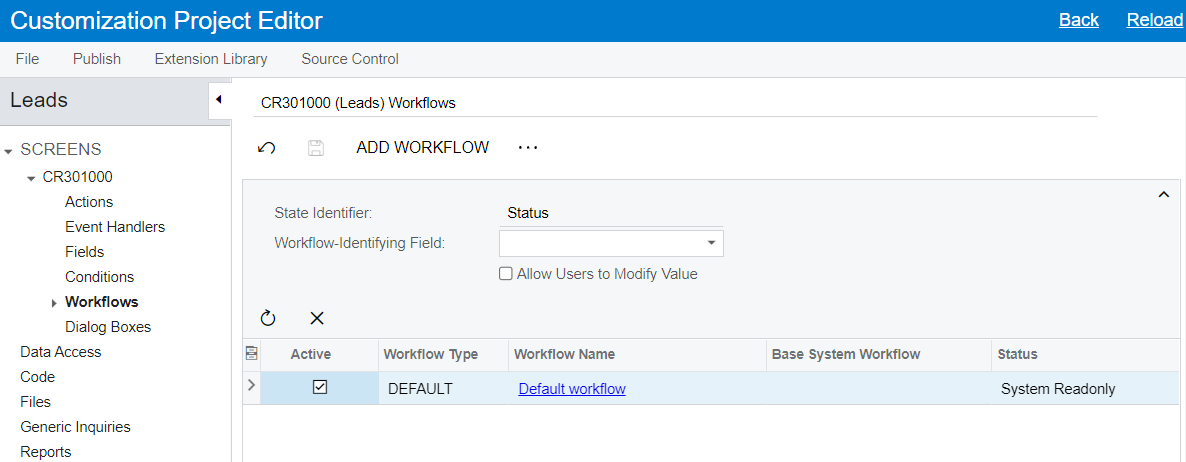
The Workflows Page
The Workflows page contains the list of all workflows defined for a particular screen—predefined workflows, as well as inherited or custom workflows—as well as the general settings of the workflow.
The following screenshot shows the Workflows page with a single workflow (the predefined workflow with the name Default Workflow) for the Leads (CR301000) form. Notice that the page name is CR301000 (Leads) Workflows; the screen number and its name (in parentheses) precede Workflows.
The Tree View of the Workflow Page for Different Workflow Types
The Workflow (Tree View) page provides the tree view of the selected workflow in the States and Transitions pane. In the right pane, the page has tabs that hold the settings of the workflow. The page has some differences based on the type of workflow you are viewing—custom, inherited (customized), or predefined. (See the following screenshot, which shows a predefined workflow.)
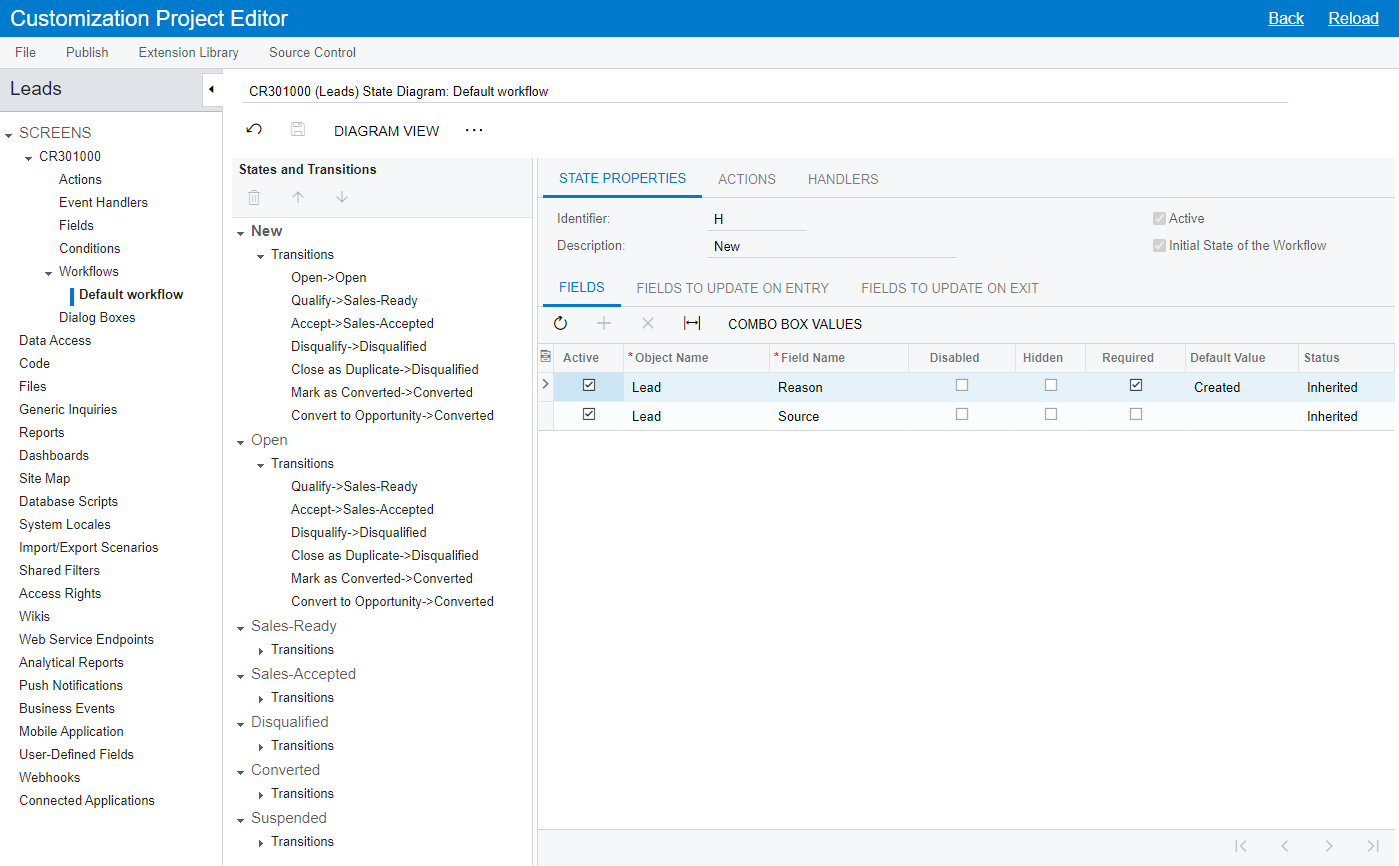
The screenshot shows the lead workflow—that is, the workflow of leads that are created on the Leads (CR301000) form. Notice that the name of the page starts with CR301000 (Leads) to indicate the screen whose workflow is being edited. The screen ID is followed by State Diagram and the workflow name, which is Default Workflow in the screenshot above. (This name is assigned to the predefined system workflow of a screen with only one predefined workflow.)
For a custom, inherited, and predefined workflow, the page has the same major parts: the page toolbar, the States and Transitions pane, and the tabs area. The variants of the page are different in the following ways:
- For a custom workflow, all commands on the More menu are available; the names of states and transitions do not have Inherited or Modified after them.
- For an inherited (customized) workflow, all commands on the More menu are available; the names of states and transitions in the States and Transitions pane have Inherited or Modified after them.
- For a predefined workflow, all commands on the More menu except for Tree View (or Diagram View) are unavailable.