Transitions: To Implement a Transition Triggered by an Action
This activity will walk you through the process of implementing a transition that is triggered by an action.
Story
Suppose that a user should be able to remove a repair work order from hold when the order has the On Hold status. The user will be able to do this by clicking the Remove Hold button on the form toolbar or the corresponding command on the More menu. As a result, the status of the repair work order should be changed to Ready For Assignment.
You need to implement a simple transition from the OnHold workflow
state to the ReadyForAssignment workflow state. This transition is
performed without the system considering the prepayment requirements.
Process Overview
To implement a transition from the OnHold workflow state to the
ReadyForAssignment workflow state, you will use or define the
following components in the screen configuration:
- The
OnHoldworkflow state, which is the initial workflow state for the transition. - The
ReadyForAssignmentworkflow state, which is the target workflow state for the transition.You have defined both workflow states in Workflow States: To Define a Workflow State.
- The
ReleaseFromHoldaction, which is the element that triggers the transition.In this activity, you will use the implementation of the
ReleaseFromHoldaction from Workflow Actions: To Implement a Simple Action. - The transition.
System Preparation
Make sure that you have done the following:
- Prepared an instance with the PhoneRepairShop customization project and enabled the workflow validation by performing the following prerequisite activities:
- Prepared the screen configuration and defined the set of states by performing the Screen Configuration: To Prepare a Screen Configuration for a Form Without a Predefined Workflow prerequisite activity.
- Defined the
ReleaseFromHoldaction by performing the Workflow Actions: To Implement a Simple Action activity. - Defined the
OnHoldandReadyForAssignmentstates by performing the Workflow States: To Define a Workflow State activity.
Step 1: Defining a Transition
In this step, you will define a transition from the OnHold workflow
state to the ReadyForAssignment workflow state. Do the
following:
- In the
RSSVWorkOrderEntry_Workflowclass, in the static Configure method, locate the AddDefaultFlow method. - Call the WithTransitions method in the lambda expression for
the AddDefaultFlow method, as the following code
shows.
.WithTransitions(transitions => { }) - Inside the lambda expression of the WithTransitions method,
add the transition by calling the Add method, as the
following code
shows.
                        transitions.Add(transition => transition
                            .From<States.onHold>().To<States.readyForAssignment>()
                            .IsTriggeredOn(graph => graph.ReleaseFromHold));
In the code above, you have specified the following:
- The source workflow state for the transition (which is
OnHold) as a type parameter of the From method - The target workflow state for the transition (which is
ReadyForAssignment) as a type parameter of the To method - The entity that triggers the transition (which is the
ReleaseFromHoldaction) in the IsTriggeredOn method
- The source workflow state for the transition (which is
- Save your changes.
Step 2: Testing the Transition
In this step, you will test the transition from the OnHold workflow
state to the ReadyForAssignment workflow state. Do the
following:
- Rebuild the
PhoneRepairShop_Codeproject. - In MYOB Acumatica, on the Repair Work Orders (RS301000) form, create a record, and specify the
following settings:
- Customer ID: C000000001
- Service: Battery Replacement
- Device: Nokia 3310
- Description: Battery replacement, Nokia 3310
- Make sure that the record has the On Hold status and that the
Remove Hold button is displayed on the form toolbar
and highlighted in green, as shown in the following screenshot.
Figure 1. A new record on the Repair Work Orders form 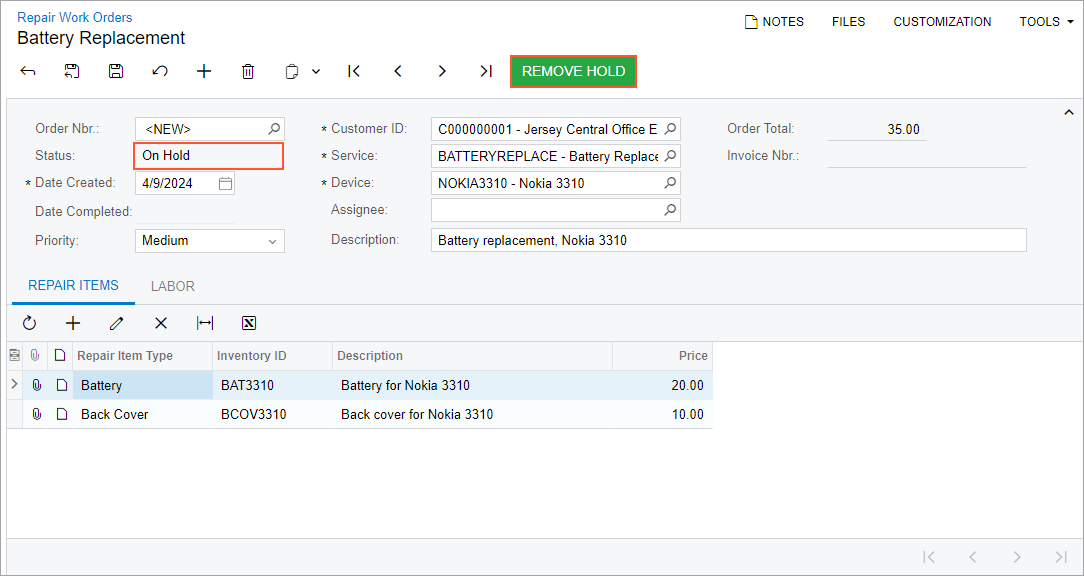 Tip:The More menu is not displayed because the workflow includes only one action and this action fits on the form toolbar. If there was only one workflow action and it could not be displayed on the form toolbar, then the More menu would be displayed.
 - Save the repair work order.
- On the form toolbar, click Remove Hold.
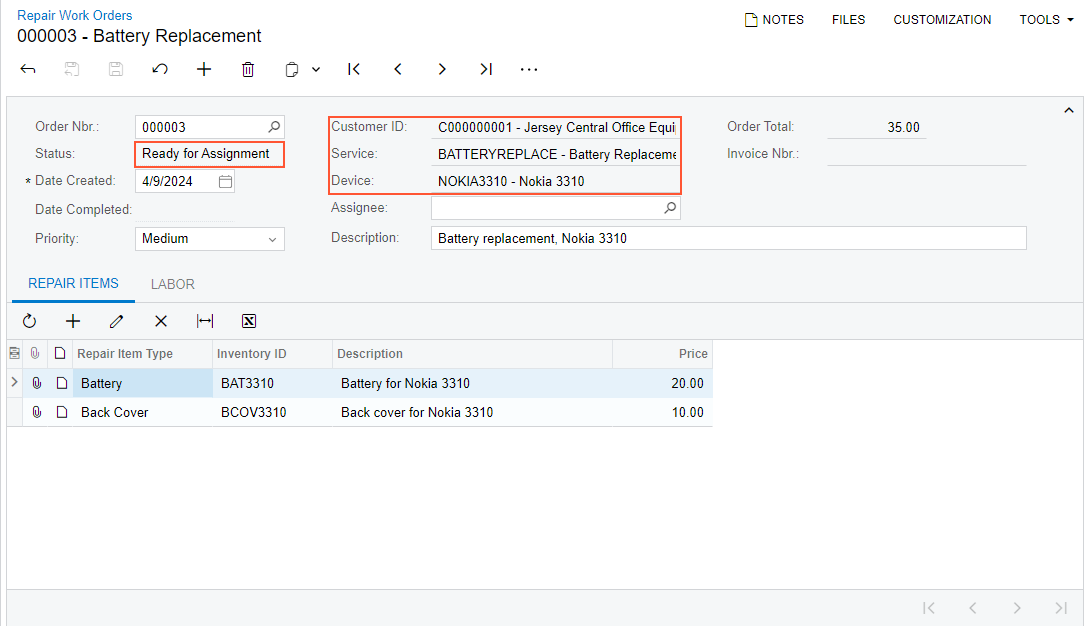
- Notice that the status of the record has been changed to Ready for
Assignment and that the Customer ID,
Service ID, and Device ID
boxes are unavailable, as shown in the following screenshot.
Figure 2. A record with the Ready for Assignment status