To Create a New Project
Because the MYOB Acumatica Customization Platform uses a customization project as a container for the customization items, the platform does not permit you to perform any customization without starting a customization project.
You can create a customization project in the following ways:
There are no differences between these ways because the result is the same: a new customization project with the specified name is added to the MYOB Acumatica instance as a record in the database. The platform can then use this project as a container of customization items.
Adding a Customization Project on the Customization Projects Form
To add a customization project on the Customization Projects (SM204505) form, perform the following actions:
- Navigate to .
- On the form toolbar, click Add Row (+), as shown in the following
screenshot, to add a row to the list of the projects on the form.
Figure 1. Adding a row to the customization project list 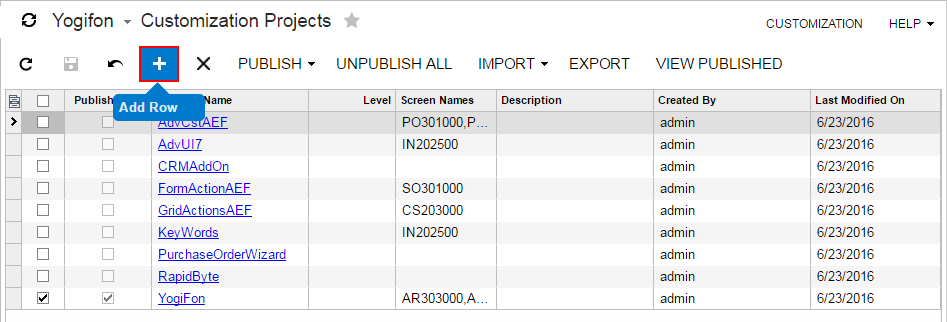
- In the new row, specify a unique name for the project, as the screenshot below shows.
- Click Save on the form toolbar to save the new project in the
database.
Figure 2. Entering the new project name 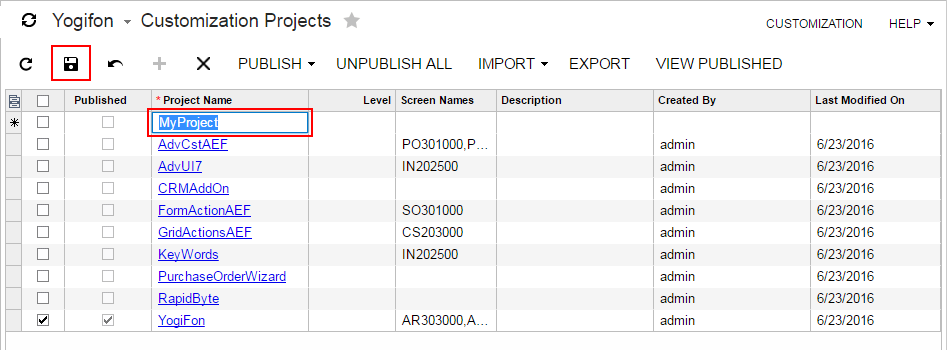
Creating a Customization Project from the Customization Menu
To create a customization project from the Customization Menu, perform the following actions:
- On any form of MYOB Acumatica, click , as the following screenshot shows (item a).
- In the Select Customization Project Dialog Box, which opens, click New (item b).
- In the New Project Dialog Box, which opens, enter the name of the new project (item c).
- In this dialog box, click OK (item d) to create the project in
the database and close the dialog box.
Figure 3. Creating a customization project from the Customization menu 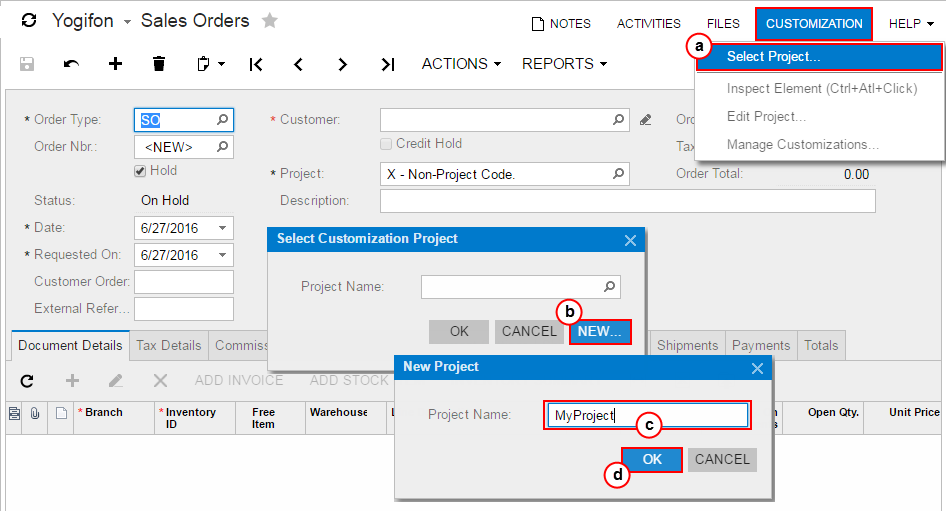
Creating a Customization Project from the Element Inspector
Suppose that you have not selected a customization project. In the Element Properties Dialog Box, if you have tried to start performing customization by clicking Customize, , or , the inspector opens the Select Customization Project dialog box to force you to select or create a customization project.
To create a customization project from this dialog box, perform the following actions:
- In the dialog box, click New.
- In the New Project dialog box, which opens, enter the name for the new project (item c).
- In this dialog box, click OK to create the project in the database and close the dialog box.