Opportunity Quote Options
The functions that are available to be performed on Opportunity quote lines are detailed below.
Toolbar Options
Change quote total The ![]() button can be used to alter the quoted values of lines to sum to a specified total. The system prompts for the new total.
button can be used to alter the quoted values of lines to sum to a specified total. The system prompts for the new total.
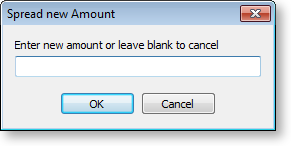
Lines are proportionally altered by factoring them on the basis of old total versus new total (the difference is spread according to the lines original value). If you have some lines which you do not wish to be altered by this process then set the value in their Spread column to N.
Check for Price Changes Click the ![]() button to check quoted prices against the latest cost and selling prices from the stock ledger. A prompt will appear when copying a quote or a job, when converting a quote to a job, or manually by pressing the calculator button.
button to check quoted prices against the latest cost and selling prices from the stock ledger. A prompt will appear when copying a quote or a job, when converting a quote to a job, or manually by pressing the calculator button.
Check Stock Level The current levels of stock relating to the requirements of a quotation can be checked before it is activated as a job by clicking the ![]() button. This may be useful to help decide whether the lines need to be set to be purchased or whether it is expected that stock be taken from a particular stock on hand location.
button. This may be useful to help decide whether the lines need to be set to be purchased or whether it is expected that stock be taken from a particular stock on hand location.
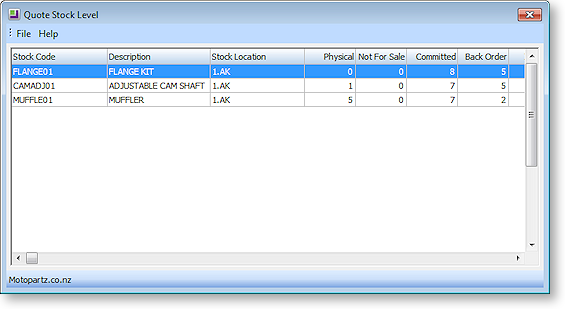
Move line up/down The quote lines can be reorder by selecting a line and using the ![]() or
or ![]() buttons to move it up or down. The arrangement of the quote lines is saved when the quote is saved.
buttons to move it up or down. The arrangement of the quote lines is saved when the quote is saved.
Quote Options

By default, all lines of a job belong to the DEFAULT OPTION, which is automatically created for each job. When quoting, it may also be preferable to include additional lines for optional extras or upgrades to the default being quoted.
To create or maintain one or more additional Quote Options click the Setup button. A search screen of additional Quote Options will be displayed. For a new job where additional options have not yet been created, there will be no entries.
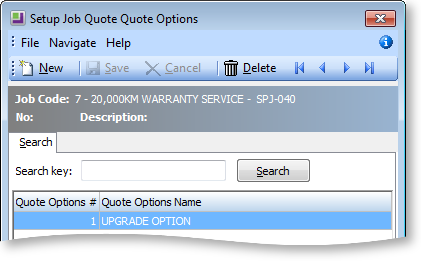
To create a new option click New. To edit an existing, option double-click its entry.
The name of the option can be set or maintained.
For each line on the Quote/Budget tab, the Quote Option column can be changed from the DEFAULT OPTION.
Ticking or unticking a Quote Option in the header panel will include/exclude that option from the job totals at the bottom of the screen.
The Quote Options can also be used in Clarity reporting to provide alternate quoted options within the single job.
Right-click Menu Options
Right-clicking on a quote line will show options relevant to the line. These options change depending on the characteristics of the current line. Some are common with the toolbar actions detailed above.
Note: Any options specific to Job Costing are not available.
Add Narrative (CTRL+N) This allows a line level narrative to be added to or edited for a line. A narrative editing window is opened with blank or previously entered text. Right clicking in the text area provides additional options for inserting text:
- Insert Common Phrases - adds a Common Phrase to the narrative.
- Insert Stock Notes - copies the content of the Notes tab from the Stock Item setup screen.
Set Line Status as Lost/Quote This sets the Status column for the selected line to "LOST". If the line is already in the "LOST" status, this option changes it back to "QUOTE". When right-clicking on a kit, this option becomes Set Kit Status to Lost/Quote, and affects all lines in the kit.
Split line This allows a line that has a quantity > 1 to be split into two lines so that they can be acted upon independently. The system will prompt for the quantity to be split-off into the new line:
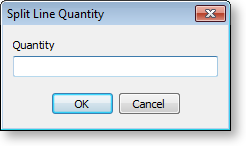
The remainder of the quantity will be left on the original line.
Attach Line to Kit At least one kit must exist on the job before this function can be used. When selected a search screen of kit headers on the job appears so that you can select which kit the line is to be appended to. The line will be re-sequenced if necessary and added as the last line of the kit.
Remove Line (CTRL+DEL) This deletes the current line from the job. A confirmation request is displayed.
Check Stock Level This checks the current levels of stock relating to the requirements of a quotation. This function is also available by clicking the ![]() button.
button.
Kit Functions
When right-clicking on a kit header or one of its components, a different set of options relating to kits becomes available under the Kit sub-menu.
Append Component Line This function allows the user to select additional lines from the Bill of Materials set up for addition to the kit. These are lines that have been marked as non-default and therefore were excluded when the kit was originally added to the job. These non-default BOM lines could be substitute items (used in conjunction with delete line of the original component) or common optional extras.
Append Stock Item Line You can append a stock item line from the Stock file. Selecting this option displays the entire stock list in a search screen for selection. The item you choose does not have to be an item pre-configured as optional in the Bill of Materials.
Substitute Component Line This function is only available when right-clicking on a component line in a kit on the Costs tab. Selecting this option allows you to choose a new component item to replace the selected item.
Extra Kit information This function allows you to enter additional information for the kit. A periscope-style window is displayed to allow serial number information to be entered if this kit will make an output item:
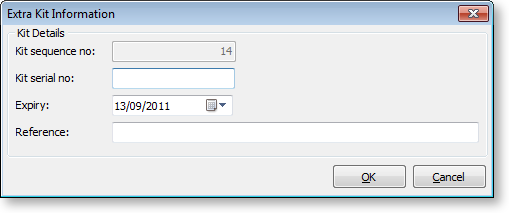
This information is for record keeping and may be printed on customer reports - the serial does not exist in the main stock serials list. If an asset is produced for the job and this is a serialised item, the serial number must be added there manually.
Copy Bill Notes This function allows you to copy the notes established on the Bill of Materials setup screen into a narrative on the kit header line within the job. The narrative may then be customised as required and therefore the notes of the Bill of Materials may constitute a template.
Marked Lines
The functions under Marked Lines on the right-click menu operate on the lines which have checkboxes ticked. All lines can be ticked/unticked by clicking the checkbox in the column header row. The Marked Lines submenu contains the following options:
Set Markup % This function prompts for a markup percentage and adjusts the sell prices of the selected lines accordingly.
Set Gross margin % This function prompts for a gross margin percentage and adjusts the sell prices of the selected lines accordingly.
Set Cost Types This function pops a combo box dialogue where the user can select a cost type to apply to the selected lines.
Set Cost Groups This function pops a combo box dialogue where the user can select a cost group to apply to the selected lines.


