- Contents
- Index
- Search

Show results that include all search words
Quote Functions
You can use these functions with quote lines:
Toolbar Options
Re-sorting lines - You can move quote lines by selecting the line and then clicking the Up or Down arrows on the toolbar.
Convert Quote - Select the Convert Quote to Actual Cost and Convert Quote to Invoice options to activate a job when a quote is accepted, and to change the stock movements to work in progress.
This function assumes that there is adequate stock available and sets the quantities as negative if there isn’t. You can also invoice transactions immediately. If the option to exclude stock from work in progress is enabled, you can transfer transactions from the Quote tab to the Invoice tab without making the stock movements.
A warning message displays if you try to convert quote lines with the Copy to option set to P to actuals. Click Yes to convert the lines to costs and to move them to the Costs tab in the Job Details window.
Note: If lines contain serialised or batch-tracked stock items, you must convert them to actuals before converting them to an invoice.
Actions Menu
Select these options from the Actions menu:
-
Copy - Select this option to append lines defined in a separate job to the current job.
Note: If you are copying serialised lines from another job, you can pre-assign serial numbers to them.
-
Change Quote Total to new Amount - Select this option to change the quoted values of lines to sum to a specified total. Job Costing prompts you for the new total.
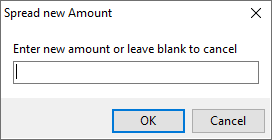
Lines are proportionally altered by factoring them based on the old total versus new total (the difference is spread according to the lines original value). If you have some lines that shouldn't be altered by this process, set the value in their Spread column to N.
-
Check Prices - Select this option to check quoted prices against the latest cost and selling prices from the stock ledger. A prompt displays when copying a quote or a job, when converting a quote to a job, or when you click the calculator button.
-
Check Stock Level - Select this option to check the current levels of stock for a quotation before it is activated as a job.

-
Generate Purchase Order(s) - Select this option to create purchase orders for the job. A list of suppliers from which to purchase services or materials is created, enabling you to order items that are ready for this job when it is accepted.
Highlighting the supplier and clicking the Purchase Order button populates a purchase order. You can add or remove lines from this purchase order, or select a different supplier. Each line that you order is stamped with the current job code. When the goods arrive, they are transferred directly to the job as soon as they are costed using the Inwards Goods functions.
Quote Options

By default, all lines on a job belong to the DEFAULT OPTION, which is automatically created for each job. When quoting, you can include additional lines for optional extras or upgrades to the default being quoted.
To create or edit one or more Quote Options, click the Setup button. A search screen of additional Quote Options displays. For a new job where additional options have not yet been created, there are no entries.
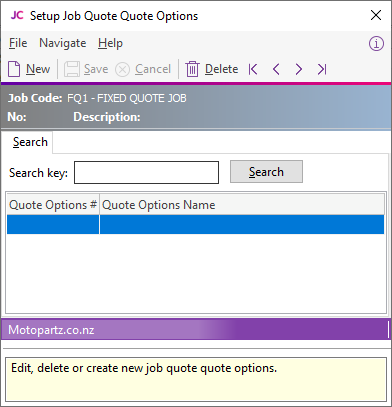
To create a option click New. To edit an option, double-click its entry. You can set or edit the name of the option.
For each line on the Quote/Budget tab, you can change the Quote Option column from DEFAULT OPTION.
Note: For kits or bills of materials, the Quote Option set for the kit header is copied to all kit lines. You cannot set options for individual kit lines.
Selecting or deselecting a Quote Option in the header panel includes or excludes that option from the job totals at the bottom of the screen.
You can also use the Quote Options in Clarity reporting to provide alternate quoted options within the single job.
Right-click Menu Options
Right-clicking on a quote or budget line displays options for the line, such as copying specific lines to the Timesheet, Cost, or Invoice tabs. These options change depending on the characteristics of the current line.
Send line to - For a line which has not been moved to another tab, you can select these options:
- Send Line to Cost Page
- Send Line to Timesheet
- Send Line Direct to Invoice
Use them to send the line to the Costs, Timesheets or Invoice tabs respectively.
Split line - Select this option to split a line that has a quantity greater than 1 into two lines. A dialog box displays where you can set the quantity to be split off into the new line:
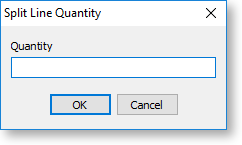
The remainder of the quantity is left on the original line.
Mark for purchase (CTRL+P) - This option is the same as changing the Copy to field to P.
Add Narrative (CTRL+N) - Use this option to add or edit a line-level narrative. An editing window opens. You can right click in the text area to:
- Insert Common Phrases.
- Insert Stock Notes, which copies the content of the Notes tab from the Stock Item setup screen.
Attach line to kit - At least one kit must exist on the job before you can select this option. Select the kit to which to append the line in the window that displays. The line is re-sequenced, if necessary, and is added as the last line of the kit.
Remove Line (CTRL+DEL) - Select this option to delete the current line from the job.
Kit Functions
Use these kit functions when creating a quote:
Marked Lines
The functions under Marked Lines on the right-click menu operate on the lines which have checkboxes selected. You can select or deselect lines by clicking the checkbox in the column header row. The Marked Lines submenu contains these options:
Set Markup % - You're prompted for a markup percentage and adjusts the sell prices of the selected lines accordingly.
Set Gross margin % - You're prompted for a gross margin percentage and adjusts the sell prices of the selected lines accordingly.
Set Cost Types - Select a cost type to apply to the selected lines.
Set Cost Groups - Aelect a cost group to apply to the selected lines.
Attach to Kit - Adds the selected lines to an existing kit on the job.
Send to Cost Page - Marks the selected lines to Copy to = C to send them to the Costs tab.
Send to Timesheet - Marks the selected lines to Copy to = T to move them to the Timesheet tab.
Send Direct to Invoice - Sends the selected lines directly to the invoice tab.
Generate Billing Schedule - You can only select this if the progress/contract billing option is active. It creates a new progress billing schedule containing the selected lines. You can enter a billing code and description for the billing schedule.
Append to Billing Schedule - Adds the selected lines to an existing progress billing schedule.
Remove from Billing Schedule - Removes the selected lines from the progress billing schedule they have already been added to.
Remove All Marked Lines - Deletes the selected lines from the job.