- Contents
- Index
- Search

Show results that include all search words
Processing Direct Debits
The Batches tab on the Direct Debit window shows all Direct Debit batches.
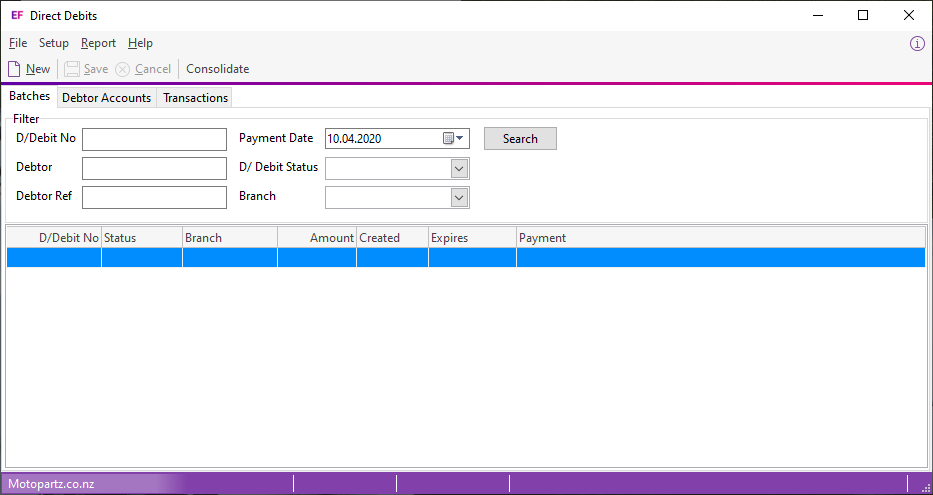
Note: If the Consolidate D/D to General Ledger option has been enabled in the Direct Debits General Setup window, you can consolidate multiple batches into a single batch by selecting Confirmed batches and clicking the Consolidate button.
Creating Direct Debit Batches
To create a batch:
-
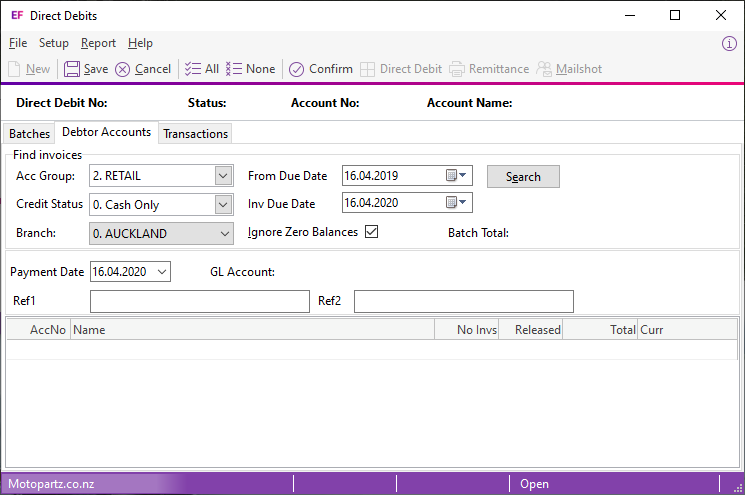
Click New. The view changes to the Debtor Accounts tab:
-
Set filter options and click Search to display Debtor accounts with outstanding invoices whose Default Payment Type is set to D/DEBIT.
-
Click All to release all invoices for all Debtors listed or double click on a Debtor to go to the Transactions tab.
-
On the Transactions tab:
-
Click All to release invoices for receipt, or
-
Select an invoice and click Part Allocate to set a part payment for the selected invoice. You can pay by an amount or a percentage.
When you click Part Allocate, the Amount field displays the total amount of the invoice or 100.00 (100% of the invoice). Enter the amount or percentage to pay and click OK. The invoice now shows that it has been released and the Amount to Pay column displays the payment amount selected by the user.
-
-
Return to the Debtor Accounts tab.
-
Enter a Payment Date.
-
Enter information in the Ref1 and Ref2 fields.
Note: You can also specify the General Ledger bank account for the Direct Debits to post into, if the Allow selection of GL Acc for D/D option is selected in the Direct Debits General Setup window. Otherwise, this field is read-only and displays the default General Ledger account entered in the Direct Debits General Setup window.
-
Save the Direct Debit Batch by:
-
Clicking Save to save the changes. The status of the batch remains Open and you can continue to edit it.
-
Clicking Confirm. The status of the batch changes to Confirmed and can't edit it.
-
Processing Direct Debit Batches
You can convert a confirmed batch to a Direct Debit file which you can import into your desktop banking software. You can also print remittances for the batch.
To process a Direct Debit batch:
-
Double click on the batch to go the Debtor Accounts tab.
-
Click Direct Debit. You must enter the Direct Debit password to proceed.
Note: The password is case-sensitive.
The Select Bank window displays.
-
Enter a new File Name if required.
-
If you need to change the bank, deselect the Use Default Bank option. Then, select a bank from the dropdown list.
-
Click OK to continue. A message window displays.
-
Click Yes, then click Open to view the contents of the file.
-
A confirmation message displays. Click Yes to continue.
-
Import the Direct Credits file into your desktop banking software and process it there.
Sending Remittance Advice
To send remittance advice to Debtors
-
Open the confirmed batch.
-
Click the Debtor Accounts tab.
-
Click either:
-
The Remittance button to print the Direct Debit Remittance Advice report. You can send the report to Debtors.
-
The Mailshot button to open the Mailshot window.
-