- Contents
- Index
- Search

Show results that include all search words
History Notes
History notes are more structured and formal than Notes. You can search for history notes, delete them, and email them. Use history notes for more formal communications with a debtor or creditor.
The History Notes tab is in the Debtors, Creditors, Non Accounts, Stock, General Ledger account, and Sales Order windows. Here are buttons and fields on this tab:
|
Field/Button |
Description |
|
New History Item |
Click this button to create a story item. This opens the New or Edit window. |
|
Delete History Item |
Click this button to delete a history item. |
|
Source |
Select the type of account from which the history note was created. |
|
Date |
The date this history item was created. Defaults to the current date but you can change it. |
|
Subject |
The subject of the history note. |
|
Staff |
The staff member who is creating this note. Defaults to the user who is currently logged, but you can enter the name of another staff member in this field. |
History Notes Window Fields
To create a history note, select New History Item from the Actions menu.
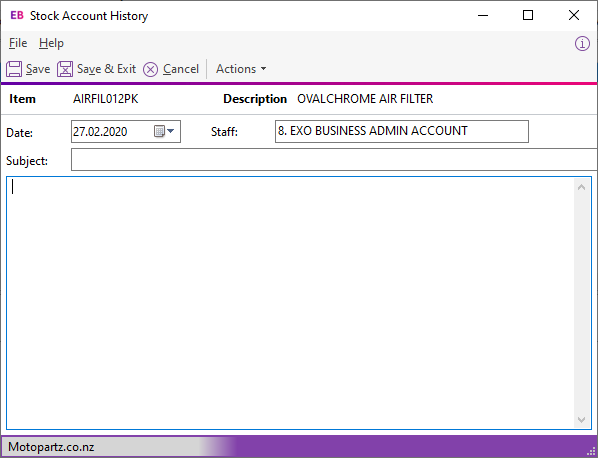
The fields in the History Notes window are:
|
Field |
Description |
|
Date |
The date this history note was created. Defaults to the current date but you can change it. |
|
Staff |
The staff member who is creating this note. Defaults to the currently logged in user, but you can enter another staff member in this field, or use the question mark search facility to search for another staff member. |
|
Subject |
Enter the subject of the history note. |
|
(Body) |
Enter the content of the history note into the main text entry field in this window. |
|
Email this History Item |
Click this button to email this history note. |
Editing the History Note
-
Select New History Item from the Actions menu to enter a note. The current system date is automatically inserted into the note. You can select a new date from the dropdown list.
-
Right-click in the editing area to open a popup menu and select a command.
Note: If the Spell Check option is not in the list, you may need to install the spelling checker DLL files and register it manually. Contact Support for the required files and instructions on how to install them.
-
Click Save.
TIP: Use the Common Phrases utility to enter repetitive text.
Saving and/or Emailing this History Note Item
-
Review the note and make changes to it. Then, click Save.
-
The Print and Email History Item options are enabled under the Actions menu. If you select Email History Item, an email is created with this information:
-
By default the recipient of the email is the current Debtor or Creditor, using the email address from the Details 1 tab.
-
The subject of the email is the Subject of the history note.
-
The content of the email is the body of the history note.
-
-
If necessary, change the email and send it.