- Contents
- Index
- Search

Show results that include all search words
Communication Waves
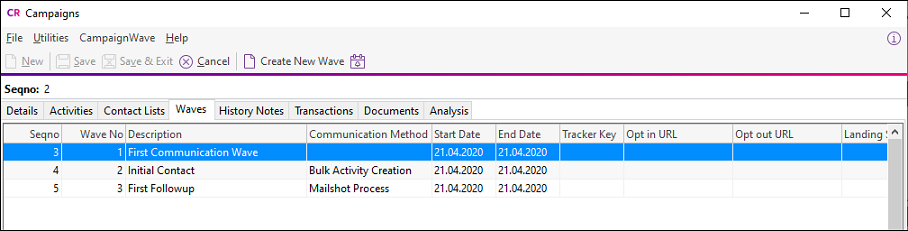
You can separate campaigns into communication waves that you can process, one after the another, as the campaign progresses. The Waves tab on the Campaigns window displays the actions planned for a campaign.
Setting up Campaign Waves
To create a campaign wave, click the Create New Wave button on the toolbar of the Campaigns window.
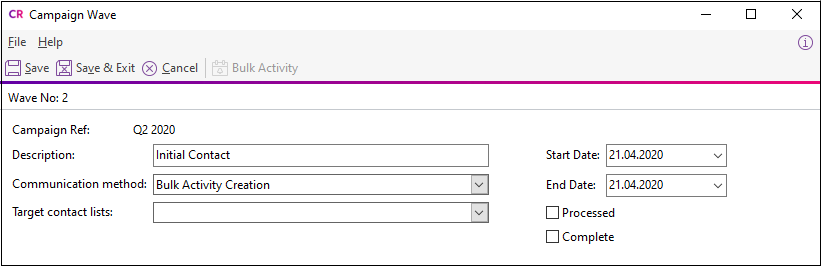
Fill in the details of the campaign wave:
|
Field |
Description |
|
Campaign Ref |
The title of the campaign that the wave is a part of. |
|
Description |
A description of the wave. |
|
Communication Method |
The action that this wave performs:
Note: You can hide communication methods using the Hide Campaign Wave Communication types User-level profile setting. If any of the methods listed above do not appear, check this profile setting. |
|
Target Contact Lists |
Select the Contact List(s) that the wave applies to. You can only select Contact Lists that appear on the campaign's Contact Lists tab. |
|
Opt in URL Opt out URL Landing Site Tracker Key |
These fields are enabled if Mailshot Process is the Communication Method. You can, for example, include one or more of them in the email template that this wave uses. Note: The values entered for these details are stored for each wave in the CAMPAIGN_WAVE table in the database. |
|
Text |
This field is enabled if Social Media Post is the Communication Method. Enter the text to send to social media network(s). |
|
Start Date End Date |
Enter the date range over which this campaign wave runs. |
|
Processed Complete |
Select these options to indicate the status of the campaign wave. When the wave is processed, the Processed flag is selected. |
Processing Campaign Waves
Campaign waves are processed in different ways, depending on the Communication Method that you select.
You can follow up campaign waves after they have been processed.
When processing a campaign wave that uses all communication methods except for Social Media Post, you can regenerate the contact lists based on their list building criteria. Doing this captures changes to Contacts that have been made since the list was last generated.
Note: This option does not appear with lists that do not use the list building criteria – for example, lists in which all Contacts were added manually.
Mailshot Process
Click the Mailshot button to start the mailshot process for all Contact Lists selected in the Target Contact Lists field.
Contacts in the target Contact List which have the Opt-Out eMarketing option selected are highlighted in grey, and are not included in the communication. This only happens for campaigns with the Campaign Type property set to Marketing.
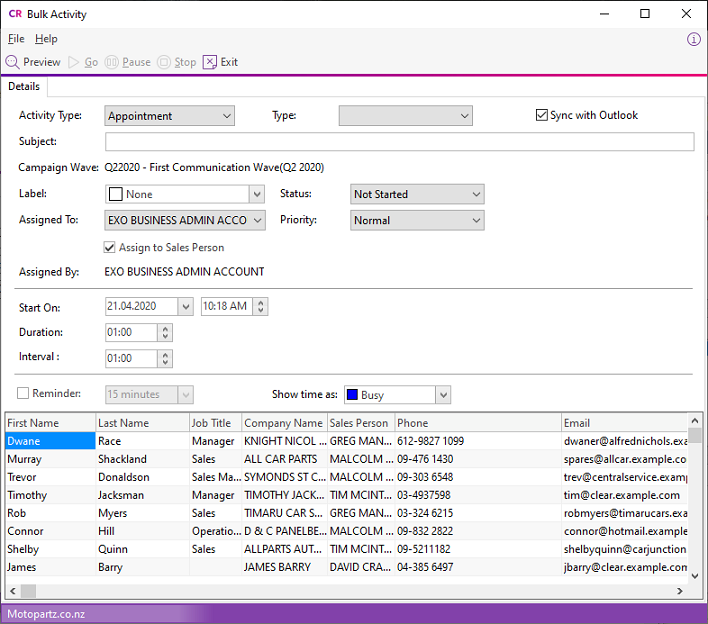
Bulk Activity Creation
Click the Bulk Activity button to open a window in which you can enter a SQL query to run against all Contact Lists selected in the Target Contact Lists field:
|
Field |
Description |
|
Assign to Sales Person |
Select this option to assign each appointment to the Sales Person associated with the Contact. If no Sales Person is specified, the appointment is assigned to the staff member specified in the Assign To dropdown. |
|
Start On |
Enter the date and time at which to start the first activity in the sequence. |
|
Duration |
Enter how long each activity should last. |
|
Interval |
Enter the amount of time between the end of one activity and the start of the next activity. |
Click Preview. The Preview tab displays a schedule of all proposed activities:

If the schedule is correct, click Go to create all activities.
Execute SQL
Click the Execute SQL button to open a window in which you can enter a SQL query to run against all Contact Lists selected in the Target Contact Lists field:
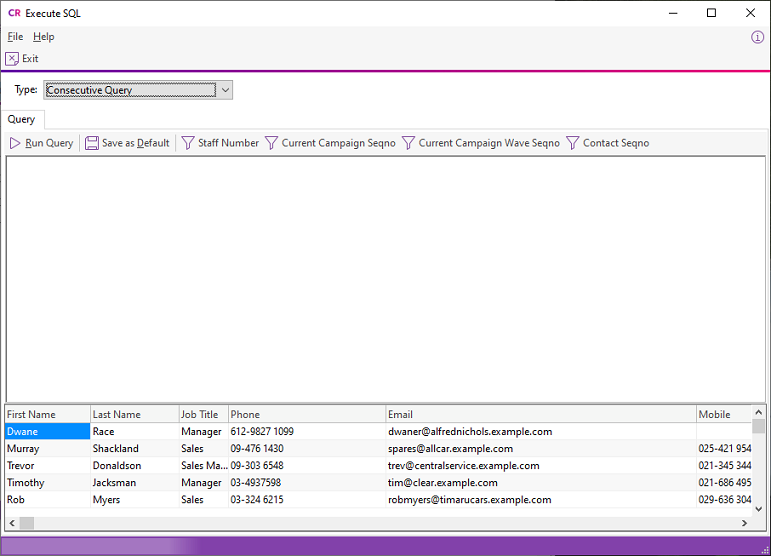
Select the type of query to run:
- Concurrent - the query applies to the entire Contact List in one operation.
- Consecutive - the query applies to each contact in the list in turn. When you select this option, the details of all members of the selected Contact List(s) display in the bottom pane of the window.
Enter the SQL query into the main area of the window, then click Run Manual Query to apply the query.
Social Media Post
Enter text for the social media post into the Text field, then click one or more of these toolbar buttons to post the text to the relevant social media network(s):
- Facebook Post
- LinkedIn Activity
- Tweet Status
The accounts posted to are set up in Exo Business Configurator under Admin > Social Media > Setup Social Media. The account details used to post with are configured on the Setup Social Media screen.
Export List
Click the Export List button to open this window:
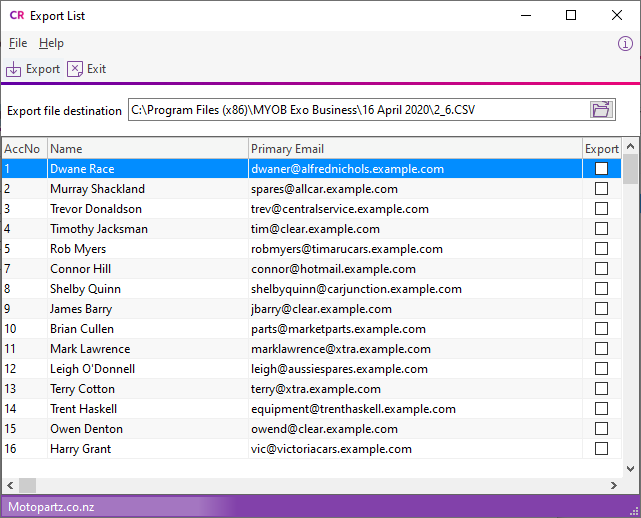
All Contacts from the list(s) specified in the Target Contact Lists field display in the grid. Select the Export box for all Contacts whose details to export. Right click on the column headers and choose Select visible columns to select the columns to export. All visible grid columns, except the Export column, export to a CSV file.
Enter the name of the CSV file to export to, then click Export. You can use the exported CSV file in third-party applications — for example, a bulk mailing system.
Contacts in the target Contact List which have the Opt-Out eMarketing option selected are highlighted in grey, and are not included in the communication. This only happens for campaigns with the Campaign Type property set to Marketing.
Execute External Program
Click the Execute External Program button to open this window:
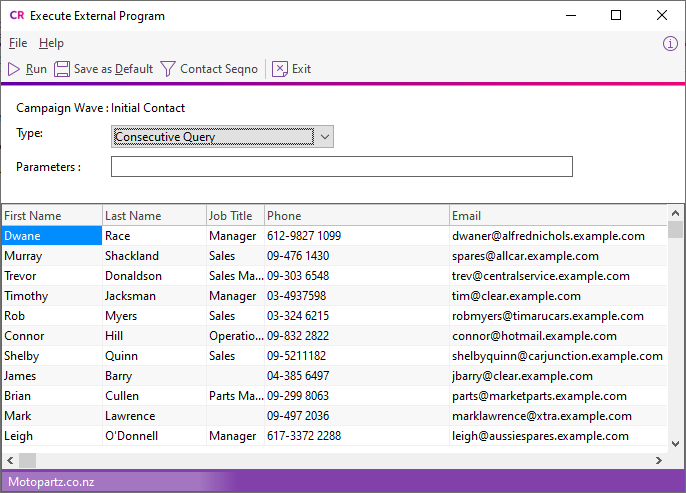
Select one of these options from the Type list to run the program:
- Concurrent Query - the program is run once for the entire Contact List.
- Consecutive Query - the program is run for each Contact in the list in turn. When this option is selected, the details of all members of the selected Contact List(s) appear in the bottom pane of the window.
Enter the name of the file or executable to run and any additional parameters into the Parameters field.
To run an external program, enter
"MyProg.EXE <LOGIN> <CURRENT>"
Where <LOGIN> passes the database connection details, <CURRENT> passes the campaign wave SEQNO in Concurrent mode, and each Contact's SEQNO in Consecutive mode.
Note: Clicking the Campaign Wave Seqno or Contact Seqno toolbar button adds the <CURRENT> parameter to the end of the parameter string.
Enter a parameter with the extension .CLR to run Clarity.
Click Run to run the file or executable.
Following up Campaign Waves
Exo Business records when and how campaign waves are processed. You can use the information when following up on a wave after it has been processed.
When a campaign wave is processed, a History Note is added to the campaign's History Notes tab and to the History Notes tabs for each Contact when you use one of these communication methods:
- Execute SQL
- Export List
- Execute External Program
If you select the Save copy of sent email option in the Mailshot window, Exo Business creates a History Note for each Contact that the mailshot was sent to. A copy of the email is saved to the Documents tab on each contact's record.
The CAMPAIGN_WAVE_AUDIT database table contains a record of which Contacts each campaign wave was sent to. Exo Business creates an audit log for these communication methods:
- Mailshot Process
- Execute SQL
- Export List
- Execute External Program