- Contents
- Index
- Search

Show results that include all search words
Entering Timesheet Transactions
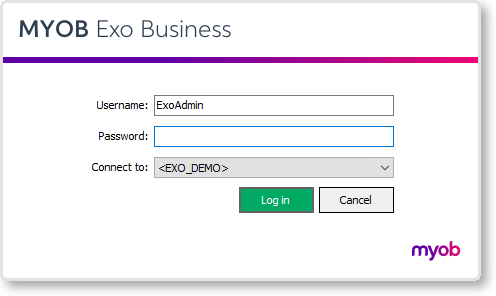
When you launch the Timesheet.exe application, a standard Exo Business login screen appears:
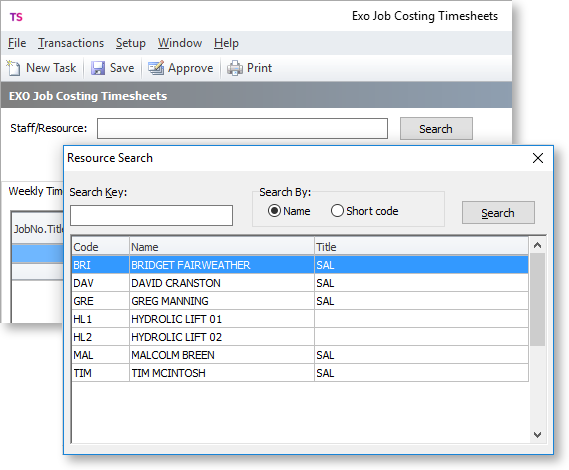
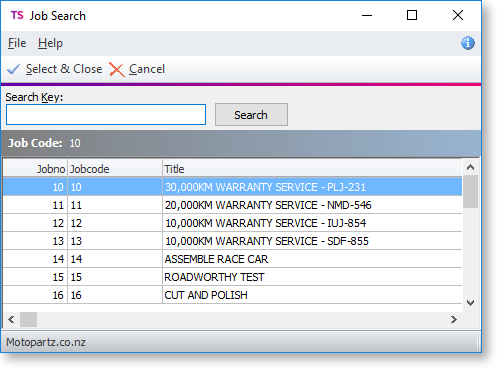
The username you use to login will be the default job resource name used in the timesheet application, if the resource is a staff member. If not, you will need to specify one - click the Search button to open the Resource Search window:
A full current week in view is presented by default, with columns showing Monday to Sunday. Week and Day totals are displayed as row and column totals respectively in the summary section.
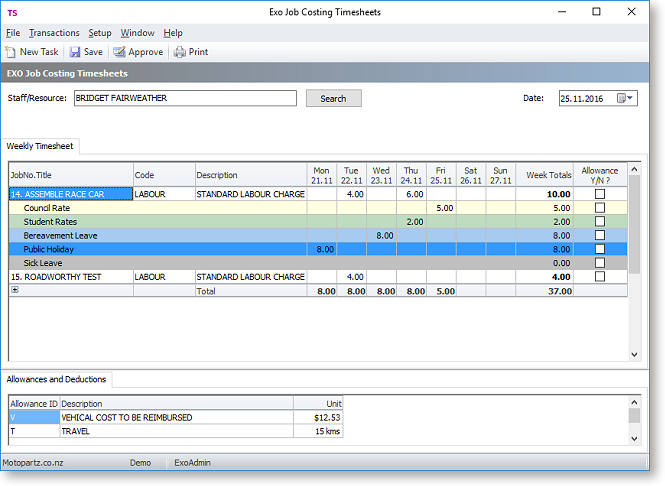
You can select the week to enter times for using the Date drop-down calendar:
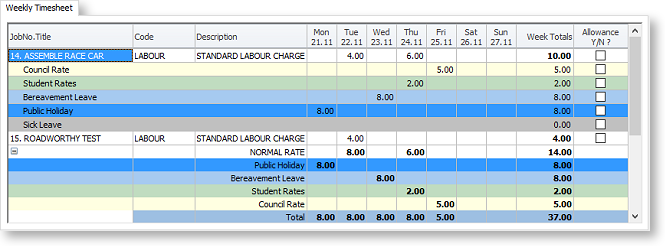
The summary section at the foot of the display grid is actually separate from the entry grid and can be expanded and collapsed as required to provide more room for entry rows. Day totals are shown broken down by distinct timesheet rates.
Once you have identified the Staff/Resource, and the week in which this timesheet is being keyed, you can begin entering new tasks. Click New Task on the toolbar.
Each task must be assigned to a job (if the task is non-job related, we suggest that you set up one or more jobs for recording unproductive time).
You can search for existing jobs by system assigned Jobno, user assigned Jobcode or part of the job description.
Note: This interface does not allow you to create, edit or drill through to jobs.
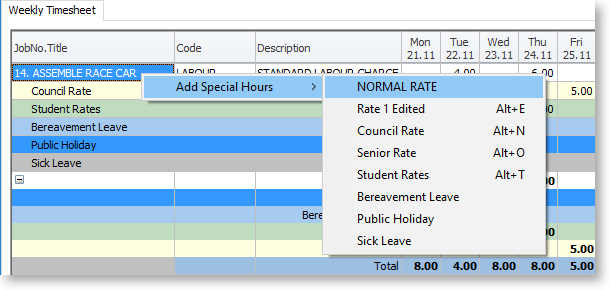
Once you have selected the job you can select a work code. These are codes from Exo Business inventory or price book. The normal pay rate will apply to a line entered, but you can immediately apply special pay rates by right-clicking on the line and selecting from the Timesheet Rates that you defined previously.
Once you have entered time units into the grid you can add annotations or narratives by right-clicking on the cell and selecting Add Narrative.
This narrative interface uses the same window that appears elsewhere in the Exo Business system, including the ability to use Common Phrases to save repetitive entry. Once a narrative exists, a small arrow appears in the corner of the cell. You can return to and edit this narrative by clicking on the cell.
The information entered on the timesheet can be saved at any time and recalled for later editing and review by clicking the Save button on the toolbar. Timesheets must be approved before they are sent to MYOB Exo Job Costing or to MYOB Exo Payroll.