Step Two – Add Risk Areas
![]()
A Risk Area is defined as a working environment which exposes an employee or group of employees to a specific set of hazards.
Select Step Two from the Setup Cycle. A list of all Risk Areas defined in the system appears. Click the Add button to create a new Risk Area, or select an existing Risk Area from the list to edit it.

In this window you can enter any Risk Area codes & descriptions of these Risk Areas. The Risk Areas that you create must match the structure you created in the Company Setup window.
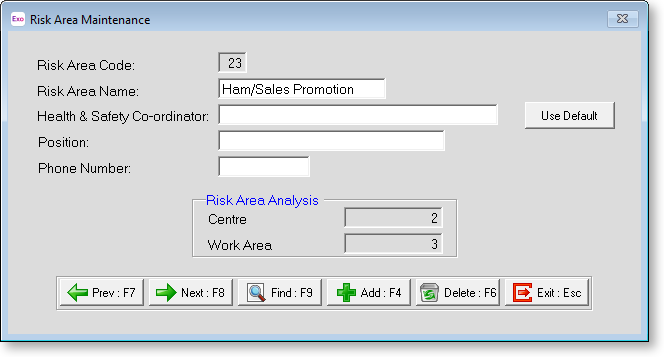
The applicable risk areas in Risk Area maintenance might be any number between 01 – 99. The 1st 9 being the highest possible Centre. The 2nd 9 being the highest possible Work Area. In the above example, the Risk Area structure is Centre 2, Work Area 3.
Risk Area Code Enter the code you wish for this Risk Area up to 12 digits (999999999999) in length. Remember to follow the structure that you created in the Setup Exo Health and Safety screen.
Risk Area Name Enter the name you wish to call this Risk Area up to 20 characters in length.
Health & Safety Co-ordinator Your company may have a person nominated for managing incidents, occupational hazards and Claims for a specific Risk Area – enter that person's name here.
Position Enter the Co-ordinator's regular job title.
Phone Number Enter the Co-ordinator's contact telephone number.
Use Default Your company should have a person who is ultimately responsible for managing incidents, occupational hazards and claims across the company. This person is specified on the Company Setup window. If there is no specific person for this Risk Area you can use the Company Default person.
Analysis This will appear automatically on the screen showing you the breakdown of the code you have just entered according to the structure you have created. This is where you can see if the Risk Area number or structure needs altering.
