Step Four - Add Employees
![]()
You may add employees at any time. You can add all of your employees into the system at this point, or you may choose to only add employee when they have had accidents. How employees are added depends on whether or not MYOB Exo Employee Information is installed standalone or integrated with MYOB Exo Payroll.
Standalone System (Exo Employee Information only)
Employees are added from the Setup Cycle. You will need contact phone numbers and addresses, emergency contact details, and IRD numbers.
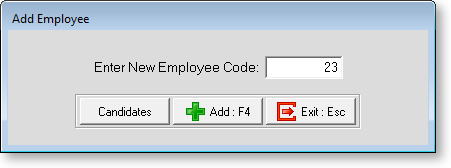
Select Step Four of the Setup Cycle. The following window appears:

-
To add a new employee, enter the Employee Code number and click Add.
-
To convert an existing candidate to an employee, click the Candidate button. A picklist of candidates appears; double-click on the candiate that you want to convert to an employee.
In either case, the Employee Maintenance window opens, where you can enter details for the new employee. When adding a new employee, only the Employee Details tab is available to begin with. Once all required information is entered on this tab, the other tabs become available.
NOTE: When converting a candidate to an employee, a new employee record is created, but the original candidate record is not deleted. It can be deleted manually, or you can keep it as a historical record.
Integrated System (Exo Payroll & Exo Employee Information)
Employees are not added in MYOB Exo Employee Information. When you add your employee into MYOB Exo Payroll, the employee is automatically brought across with the same employee code into Exo Employee Information. See the Exo Payroll documentation for information on how to add employees.
NOTE: In an integrated system, candidates are converted to employees in Exo Payroll - if any candidates have been added, a Candidates button is available on the Add Employee window in Exo Payroll.
