
MYOB Acumatica Access: General Information
The first thing to do when you want to work with MYOB Acumatica is sign in to the system. In the following sections, you’ll find information about doing this.
Learning Objectives
In this chapter, you’ll learn how to do the following:
- Sign in to MYOB Acumatica
- Switch between the available companies and branches
- Sign out of MYOB Acumatica
Applicable Scenarios
You need to learn about signing in to MYOB Acumatica if you haven't done so previously.
Access to MYOB Acumatica
MYOB Acumatica is a web-based application. To begin the sign-in process, you open a web browser and type the URL of the MYOB Acumatica instance.
For working with MYOB Acumatica, we recommend that you use one of the following web browsers:
- Google Chrome
- Mozilla Firefox
- Microsoft Edge
- Apple Safari
You can also open the MYOB Acumatica instance by finding it through the Start menu and clicking it or by using the MYOB Acumatica ERP Configuration Wizard. For details, see Instance Deployment: Accessing an Instance for the First Time.
MYOB Acumatica is a role-based system. The system administrator assigns one or more roles (such as Accountant or Marketing Manager) to your user account. Based on your assigned roles, you can view and work with specific companies, branches, workspaces, and menu items within the workspaces.
To use the system, you can use an account of any of the following types:
- An MYOB Acumatica account: You use the username and password that the system administrator has created for you in MYOB Acumatica to sign in to the system.
- A domain account: If the system administrator has integrated MYOB Acumatica with Microsoft Active Directory, you use your domain login and password (the credentials that you use to sign in to your computer).
- An account of an external identity provider: If the system administrator has configured single sign-on with an external identity provider, such as Google or Microsoft account, you use the credentials of this provider to sign in to MYOB Acumatica.
When you have finished working with MYOB Acumatica, be sure to save the results of your work and sign out to prevent unauthorized access to the system.
Basic Elements of the MYOB Acumatica Sign-In Page
You use the MYOB Acumatica Sign-In page to sign in to the system, submit a request to your system administrator to recover your password (if the security policy of your company allows this), and go to the MYOB Acumatica official website. The Sign-In page also includes information about the system version and any applied customization projects; these details may be useful to some users under some circumstances, such as during troubleshooting.
Below you can see the basic elements of the MYOB Acumatica Sign-In page.
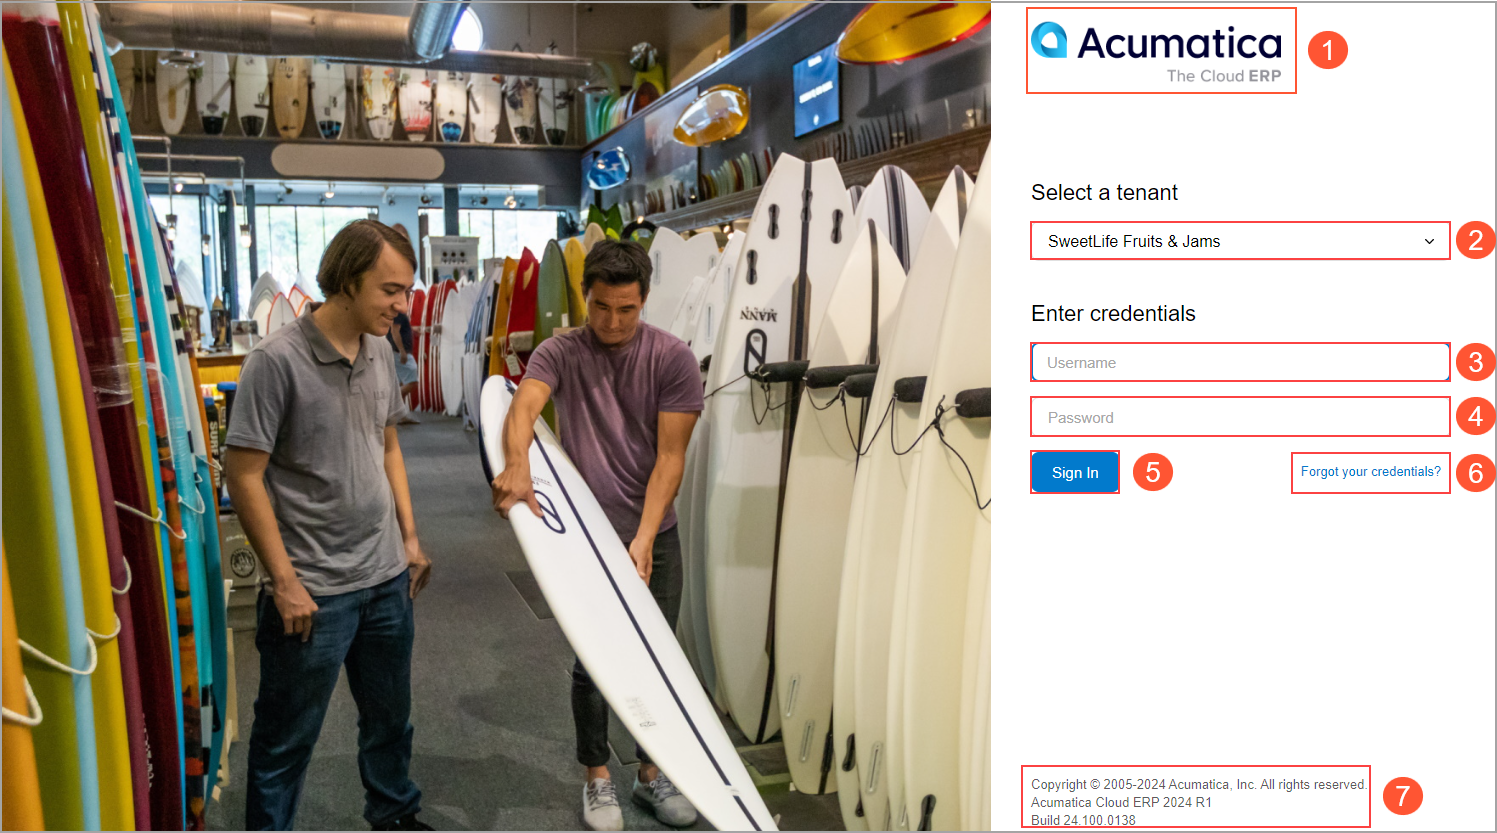
The following elements may be visible on the MYOB Acumatica Sign-In page:
- The button with the MYOB Acumatica logo. You can click this button to open the MYOB corporate website in a new browser tab.
- The Tenant box. This box is available only if you have access to multiple tenants.
- The Username box.
- The Password box.
- The Sign In button.
- The Forgot your credentials? link.
- The information about the MYOB Acumatica version and any applied customization projects.
Tenants in MYOB Acumatica
A tenant is a unit that is used for sharing the MYOB Acumatica application with other tenants, with each tenant’s data isolated from and invisible to the other tenants.
If multiple tenants are configured in your MYOB Acumatica instance and you have access to more than one tenant, you can do the following:
- Select a tenant when you sign in to the system
- Switch between tenants when you are working with the system
Companies and Branches in MYOB Acumatica
For an organization that has a hierarchical structure of subsidiaries or branches, MYOB Acumatica supports multicompany and multibranch functionality.
When you are working with the system, you can switch between the companies and branches to which you have access if multiple companies and branches are configured in your MYOB Acumatica instance. To do this, you use the Company and Branch Selection menu, which is described in The MYOB Acumatica UI: Top Pane.