
Data from Multiple Data Sources: To Create an Inquiry with Two Tables
In this activity, you will learn how to create a generic inquiry that collects and displays data from two data access classes (DACs), which are referred to as tables on the user interface of the Generic Inquiry (SM208000) form. The activity walks you through the steps of designing a sample generic inquiry for testing purposes, so that you can develop a better understanding of the process.
Story
Suppose that you are a technical specialist in your company who is working on simple customizations, including the creation and modification of generic inquiry forms. A salesperson of your company has requested an inquiry that collects data about sales orders by customer. The salesperson would like to see the sales orders of those customers whose accounts are still in the system (that is, they have not been deleted). Also, the security policy of your company restricts access to the customer accounts and you should make sure that each salesperson will see only the allowed customer accounts.
The inquiry form should have a Selection area with the following elements, which should be empty by default:
- Date From
- Date To
- Customer
- Order Status
The results grid of the inquiry form will consist of columns that display the following information about each sales order: sales order number, type, status, date, and customer name.
Process Overview
The generic inquiry that you are going to create in this activity will collect data about sales orders and the corresponding customers. You will inspect the needed elements on the Sales Orders (SO301000) and Customers (AR303000) forms to explore which classes you can use to access the needed data.
With the knowledge you have obtained, you will create a generic inquiry on the Generic Inquiry (SM208000) form and configure the results grid, the requested parameters (that is, the elements in the Selection area), and the conditions that correspond to the parameters.
To comply with the security policy and fulfill the salesperson’s requirement, you will use the Inner join type while configuring table relations. An Inner join creates a result by combining the rows of the parent and child tables when there is at least one match in both tables. That is, if for a sales order, the system finds a customer account that was deleted or the salesperson has no access, the system will not return the sales order.
When an inquiry has been created and all the necessary settings have been specified, you will preview and then publish the inquiry.
System Preparation
Launch the MYOB Acumatica website, and sign in to a tenant with the U100 dataset preloaded as system administrator Kimberly Gibbs. You should sign in by using the gibbs username and the 123 password.
Step 1: Discovering the DACs and Data Fields
To inspect the needed user interface elements to find the needed DACs and data fields, do the following:
- Open the Sales Orders (SO301000) form.
- Point to the Order Type box, press Ctrl+Alt, and then click. The Element Properties dialog box opens.
- Make a note of the values in the Data Class and
Data Field boxes (SOOrder and
OrderType, respectively), which are the data access class and data field
you need. Close the dialog box.Tip:Although in this activity, the tasks of element inspection and generic inquiry development are kept separate for simplicity, in production development, you will generally be inspecting elements on the UI and creating the generic inquiry at the same time. In this case, you may find it convenient to have the form or forms containing the UI elements open in a separate tab, so that you can quickly switch between the Generic Inquiry (SM208000) form and the form you are using to inspect the elements.
- Repeat Instructions 2–3 for the following UI elements on the Sales Orders form:
- Order Nbr.
- Status
- Date
- Customer
The Customer element on the Sales Orders form contains an identifier of a customer but not a customer name that should be displayed in the resulting inquiry form. To obtain information about specific customer specified in each sales order, you should use the Customers (AR303000) form.
In exploring these elements, you have discovered that the data access class you need is SOOrder and the data fields are OrderType, OrderNbr, Status, OrderDate, and CustomerID.
- Open the Customers form.
- Point to the Customer ID box, press Ctrl+Alt, and then click. The Element Properties dialog box opens.
- Make a note of the values of the Data Class and Data Field elements (Customer and AcctCD, respectively), which are the data access class and data field you need.
Step 2: Creating the New Inquiry
To begin the process of creating the generic inquiry, you do the following:
- Open the Generic Inquiry (SM208000) form.
- In the Summary area, in the Inquiry Title box, type the name you will use for the inquiry: DB-SOOpenByCustomer.
- On the table toolbar of the Data Sources tab, click Add Row, and in the Source Name column, select PX.Objects.SO.SOOrder.
- On the table toolbar, click Add Related Table to add the child table for your generic inquiry.
- In the Related Tables dialog box, which opens, notice
that the system has inserted the name of the selected table
(PX.Objects.SO.SOOrder) in the Parent Table
box.
Also notice that in the Alias box to the right of the Parent Table box, the SOOrder value has been inserted.
- In the list of tables, click the row with the PX.Objects.AR.Customer full
name, and on the table toolbar, click Select Related
Table.Tip:You can use the search box below the list of tables to find the necessary table by its name.
The system inserts the name of the selected table in the Child Table box. Notice that in the Alias box to the right of the Child Table box, the Customer value is displayed.
In the Relation box, the relation between the pair of tables has been inserted.
- In the bottom of the dialog box, click the Add
button.
The system closes the Related Tables dialog box and adds the tables to the list on the Data Sources tab. It also adds the relation between the tables on the Relations tab, where you can see that the Inner join type is used for the relation.
- On the form toolbar, click Save.
Step 3: Configuring the Output Columns
To configure the columns in the generic inquiry form, on the Results Grid tab of the Generic Inquiry (SM208000) form with the DB-SOOpenByCustomer inquiry selected, do the following:
- Click Add Row on the table toolbar, and do the
following:Tip:The lists of values available for selection can be quite long. To speed up the process of selecting the needed values, start typing the needed value in the column; the system will filter the list based on the text you have typed.
- In the Object column, select SOOrder.
- In the Data Field column, select OrderNbr.
- By using the actions you performed in the previous instruction, add rows with
the following settings:
Object Data Field SOOrder OrderType SOOrder Status SOOrder OrderDate Customer AcctName Notice that the Visible and Default Navigation check boxes are selected by default for all rows. With these settings, the system will display the added columns in the inquiry results, and for data fields that have a default data entry form specified in the source code, the system will display the values in the corresponding columns of the generic inquiry form as links. When a user clicks a link in this column on the generic inquiry form, the system opens the specified form in a pop-up window with the record selected.
- On the form toolbar, click Save.
- On the side panel of the Generic Inquiry form, click the eye icon to preview the generic inquiry form you have created.
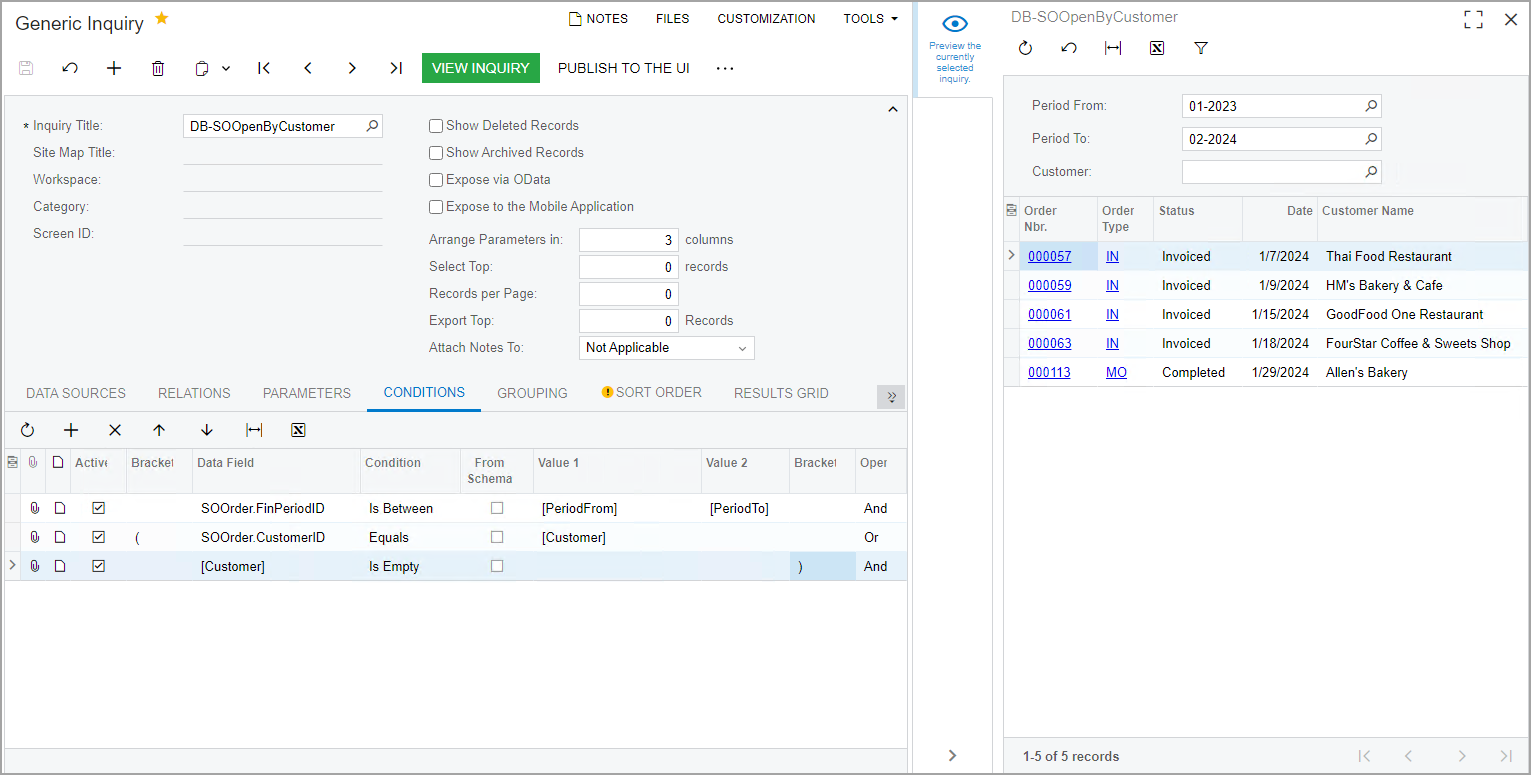
Step 4: Configuring the Selection Area (Self-Test)
You have learned how to add parameters to the Selection area while completing the following activities:
- Conditions and Parameters: To Add Period-Range Parameters to the Selection Area
- Conditions and Parameters: To Add a Field Parameter to the Selection Area
A salesperson has requested that you add parameters to the DB-SOOpenByCustomer generic inquiry, which you have developed in this activity, so that the results can be narrowed to meet each salesperson’s current needs for information. Use the knowledge and experience you have gained to add the requested parameters to the generic inquiry. After you have added the needed parameters, the Selection area of the inquiry form should have the elements shown in the following screenshot.
For details on parameters and conditions, see Conditions and Parameters: General Information.
Step 5: Publishing the Generic Inquiry Form
To add the generic inquiry form you have created to the site map, on the Generic Inquiry (SM208000) form, do the following:
- Open the DB-SOOpenByCustomer generic inquiry.
- Click the Publish to the UI button on the form toolbar.
- In the Publish to the UI dialog box, which opens, in the Site Map Title box, type Sales Orders of the Selected Customer.
- In the Access Rights section, select Copy
Access Rights from Screen, and then select Sales Orders
with the SO.30.10.00 screen ID in the box next to the option
button.
With these settings, users that have access to the Sales Orders (SO301000) list of records will also have access to the created generic inquiry.
- Click Publish to complete publication and close the dialog box.
- In the main menu, select the Data Views workspace, and under the Inquiries category, make sure the inquiry you have created is listed.