
Rich Text Editor: Configuration and Layout
In this topic, you can find general information about configuration of the rich text editor control as well as about layout adjustments.
Configuration
To configure a rich text editor, you can use the qp-rich-text-editor tag, as shown in the following code. The configuration parameters for the control are defined in the IRichTextEditorConfig interface.
<qp-rich-text-editor
  id="edBody"
  state.bind="EstimateRecordSelected.Body"
  class="stretch">
</qp-rich-text-editor>
You can also use the field or qp-field tag with the
control type specified instead of the qp-rich-text-editor tag.
Addition of Buttons to the Formatting Toolbar
While using a rich text editor, users may need to insert the previous or current value of a data field into the editing area. You can add the Data Field and Previous Data Field buttons to the formatting toolbar (shown below) to provide these capabilities..
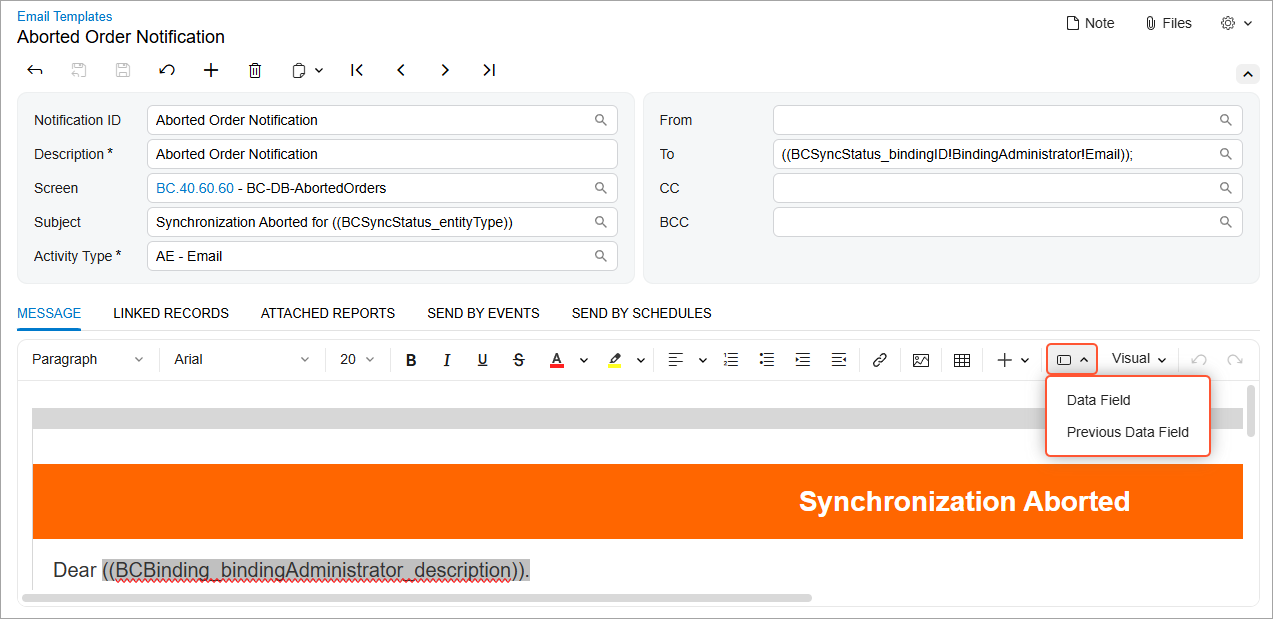
To add these buttons to the formatting toolbar of the qp-rich-text-editor control, you use the insert-data-field and insert-data-field-prev tags. You add these tags within the opening and closing tags of the qp-rich-text-editor control, as shown below.
<qp-rich-text-editor ...>
  <insert-data-field
    data-member="EntityItems"
    text-field="Name"
    value-field="Path"
    icon-field="Icon">
  </insert-data-field>
  <insert-data-field-prev
    data-member="EntityItemsWithPrevious"
    text-field="Name"
    value-field="Path"
    icon-field="Icon">
  </insert-data-field-prev>
</qp-rich-text-editor>
This code adds the Data Field and Previous Data Field buttons to the formatting toolbar.
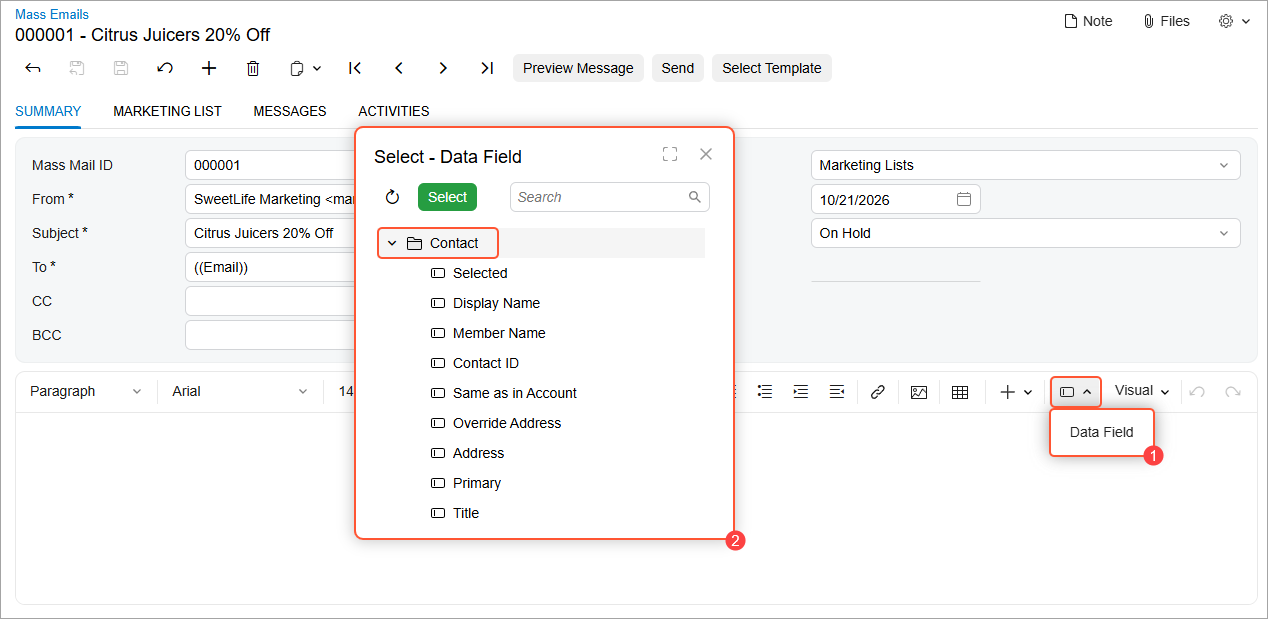
When you click either button, the Select - Data Field dialog box opens. This dialog box lists the available views and their fields, which you can insert into the editing area.
The list of views in the dialog box depend on the value of the data-member property of the insert-data-field and insert-data-field-prev tags. If you want to make the fields from only a specific view available for selection, you can use the data-field-preview tag to specify:
- The name of the view
- The name of the graph in which this view is declared
See the following example.
<qp-rich-text-editor ...>
  <insert-data-field
  data-member="EntityItems"
  text-field="Name"
  value-field="Path"
  icon-field="Icon">
  </insert-data-field>
  <data-field-preview
  graph="PX.Objects.CR.ContactMaint"
  view="Contact">
  </data-field-preview>
</qp-rich-text-editor>
Based on this code, when you click the Data Field button (Item 1 below), the Contact view and its fields are displayed in the Select - Data Field dialog box (Item 2).
Vertical Scroll in a Complex Layout
We do not recommend that you have three vertical scroll lines on a form, such as for a Summary area, grid, and rich text editor.
To avoid three vertical scroll lines, you make the following adjustments to the grid and rich text editor controls:
- Set the expandToContent property to true for the rich text editor control.
- Do not use resize in the grid.
- For the grid, specify autoGrowInHeight equal to Fit.
- For the grid, specify PageSize equal to 10.
As a result, the form will include one scroll for the whole form. The grid will grow in height until it has 10 lines. If it has more than 10 lines, it will have pages.