- Contents
- Index
- Search

Display results with all search words
Working with Sections
The Report Writer view has five pre-defined sections when you're designing a new report:
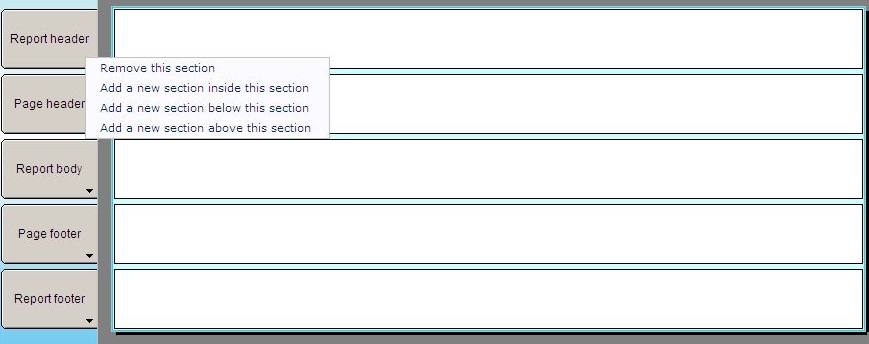
The arrow at the bottom of each section gives you access to the options for that section. You can remove default sections if they are not for the report you are designing. For example, it may not always be necessary to have a page header or report footer section.
Use add section options to insert new sections below, above, or within existing sections. For example, within the body of your report, you can insert a section used specifically to add column labels for data that is being returned from a collection (represented by its own section within the report body).
To resize sections, click the
base of the section you want to resize and the mouse will turn into an
arrow that allows you to drag the section to the required
size.
that allows you to drag the section to the required
size.
When you are satisfied your report content is correct, you can resize sections as the final step to create spacing between sections.
To select a section, click inside
the section, either within the report body, or within the section tabs
at the left hand side of the form. You will know when you have selected
as section because the section space will turn blue. When a section is
selected, and the Available Fields Palette
is accessed using the ![]() toolbar
icon, the fields that are visible and available to select are specific
to the section.
toolbar
icon, the fields that are visible and available to select are specific
to the section.
Each section type has properties
for it. To view section properties, double click the section
or click the ![]() icon on the toolbar while
on the section.
icon on the toolbar while
on the section.