Customising Dashboard Interfaces
A number of options are available for customising the layout of widgets on dashboard interfaces.
Selecting Widgets to Display
Users can select the widgets to display on a tab using the ![]() and
and ![]() buttons. Which widgets are available for selection is determined by the staff member’s dropdown menu definition, as set up in EXO Business Config.
buttons. Which widgets are available for selection is determined by the staff member’s dropdown menu definition, as set up in EXO Business Config.
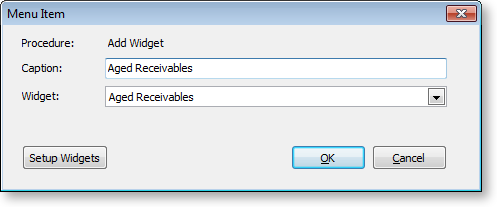
To add a widget to the menu (and therefore make it available for selection in the interface), drag the Add Widget item to menu. When adding this item to a menu, the Menu Item window that appears lets you choose the specific widget to add:

Once added, the widget does not actually appear in the dropdown menu; instead, it becomes available for selection when clicking the ![]() button.
button.
Note: Having the availability of widgets controlled by menu definitions allows for an additional level of security; users have access to only those Dashboard widgets that have been added to their menu.
Arranging Widgets
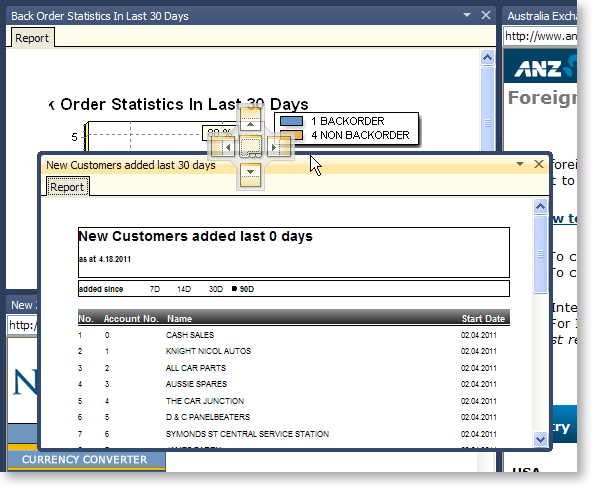
Dashboards widgets can be arranged by dragging and docking. When dragging one widget onto another, a cross-shaped docking control appears:

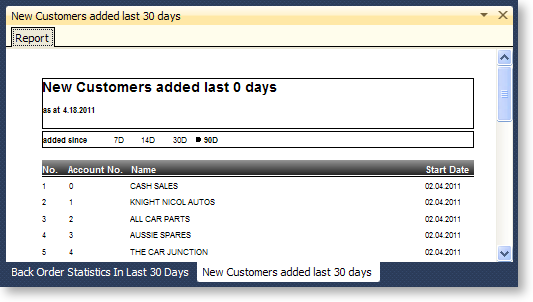
The five sections of the docking control are used to place the widget being docked, e.g. to dock the widget being dragged to the right of the widget it is being dragged onto, move the mouse pointer over the right section and release the mouse button. Selecting the centre section of the docking control docks the widget onto a sub-tab of the target widget:

Clicking the ![]() button resets the layout, organising all widgets into tiles the same size.
button resets the layout, organising all widgets into tiles the same size.
Saving Widget Layouts
Click the ![]() button to save the current arrangement of widgets as a "layout". Previously saved layouts are available in the Layouts combo box at the left of the window.
button to save the current arrangement of widgets as a "layout". Previously saved layouts are available in the Layouts combo box at the left of the window.
Note: In EXO Business Analytics, the layout of widgets on the tabs is saved for each snapshot.


