Running a Report
Select a report to run from the Report menu or from the Clarity Report Browser. After running the report, you must enter any report parameters required. You can then output the report to the required destination in the required format.
Specifying Report Parameters
If no parameters are required, the report is generated immediately. A report preview is displayed, which can then be printed.
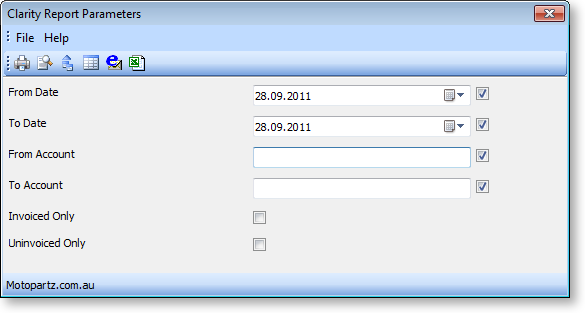
Many reports use a standard Clarity Report Parameters window for gathering parameters (some or all of which may be optional):

The exact parameters available differ from report to report, but the layout of the Clarity Report Parameters window and the available options are common to all reports that use the window.
Note: Some reports use a more complex custom window for gathering parameters. These windows are specific to their report.
Viewing, Printing and Exporting Reports
Once the required parameters have been entered, the report can be generated and then output to a variety of destinations. The Clarity Report Parameters window offers the following options are available from its File menu or toolbar:
-
Print - generates the report and prints it to the selected printer.
-
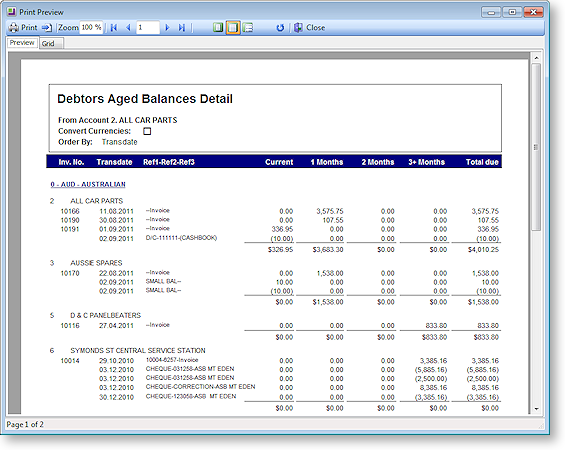
Preview - Generates the report and displays it in an onscreen viewer. The report can be printed directly from the preview, or you can close the preview to return to the Clarity Report Parameters window.

-
Export to File - Generates the report, then displays a Print to File window, allowing you to select the file format to export the report to.
-
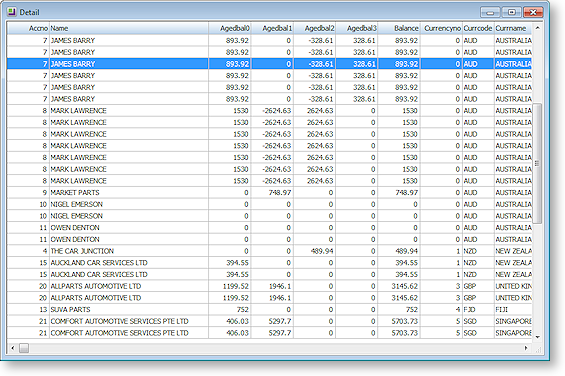
View Grid - Displays a grid containing the data that the report is generated from. This view is also available on the Grid tab of the Preview window.

-
Email Attachment - Generates the report, then attaches it to a new email as a PDF. The default email client is used for composing and sending the email.
-
Export to XLS Report - Generates the report as a Microsoft Excel report, then opens it in Excel.
-
Note: When using Excel 2010, the report will open in Protected View mode. To prevent this from happening, open the Trust Center in Excel and add the EXO Business temporary directory as a Trusted Location. The temporary directory is specified by the Directory location for temporary files Computer-level profile setting.


