- Contents
- Index
- Search

Show results that include all search words
Activities Tab
The Activities tab displays all activities associated with the job.
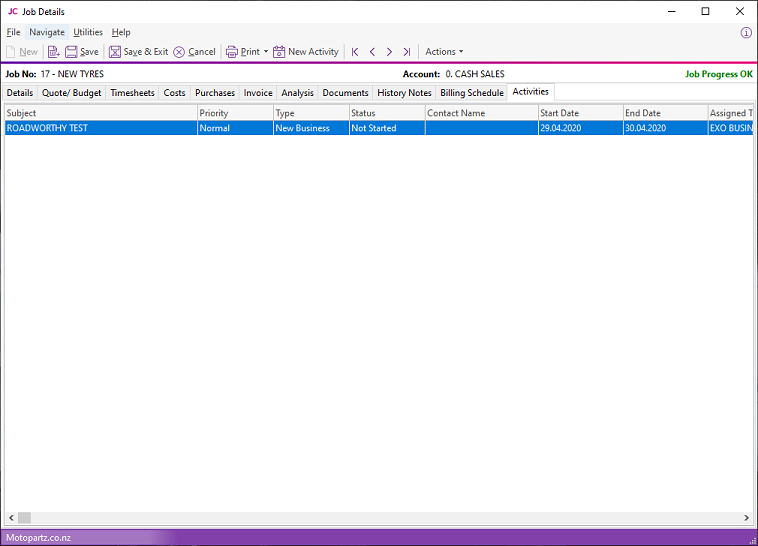
An activity can be:
-
A Task, which is a to-do item that you must complete in a specified time frame.
-
An Appointment, which is an event scheduled for a specific time.
Note: When using the Exo Business CRM module, you can synchronise activities with Microsoft Outlook. Tasks are converted to Outlook Tasks and Appointments are converted to Outlook Appointments.
Creating an Activity
Click the New Activity button on the Activities tab or the Details tab to create an activity. Or, right-click on the Task Scheduler calendar in the time slot in which to create the activity.
The Activity Window
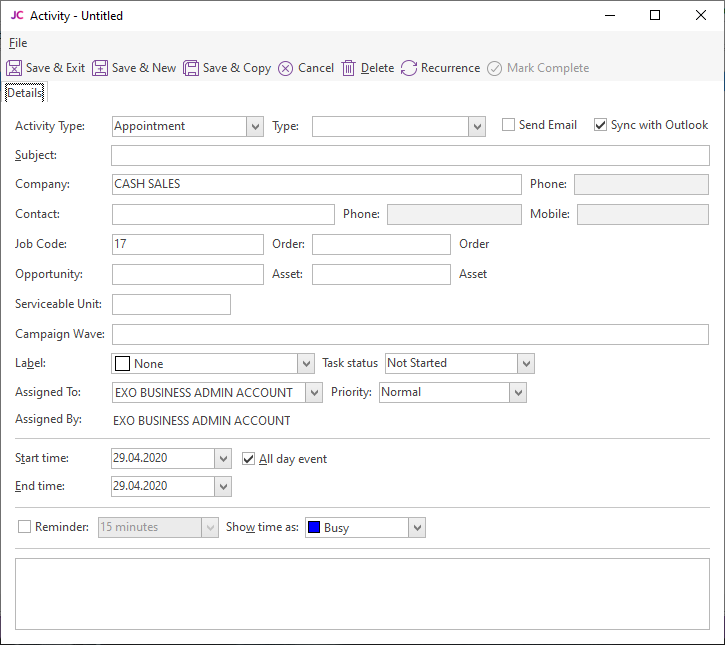
Complete these fields in the Activity window:
|
Field |
Description |
|
Activity Type |
Select whether the activity is a Task or an Appointment. |
|
Type |
This is a user-definable classification for the activity. Select a type from the list, or select Edit List... to create a type. |
|
Sync with Outlook |
If this box is selected, the activity is synchronised with Outlook whenever a sync is performed. If this box is not selected, the activity is not included in synchronisation operations. |
|
Subject |
Type a description of the activity and its purpose. |
|
Company |
Assigning an activity to a Company and/or Contact is optional. If assigned, the activity displays on the Activities tab for that company and/or the Contact screen. Note: When entering the Company name, you can use the search option by typing ? and pressing TAB. |
|
Opportunity |
This field is only available when the Exo Business CRM module is licensed. Specify an Opportunity to associate the activity with. This field is optional. |
|
Label |
Enter a label for the activity - this affects how it displays on calender displays. |
|
Priority |
Specify a priority (Low, Normal, or High) for the activity. Low and High priority tasks are indicated with an icon in calendars. |
|
Status |
The Status setting has a predefined list of entries, but you can edit or add to them by selecting the Edit List... option. For Tasks, click the Mark Complete toolbar button to the status to Completed. |
|
Assigned To |
The staff members to whom the activity was assigned, and the person who assigned the activity. |
|
% Complete |
This property applies to Tasks only. Enter the percentage completion. Clicking the Mark Complete button updates the percentage to 100%. |
|
Start
Time |
The start and end time for the activity. |
|
All day event |
If you select this option, the selections for the time of day disappear as they are no longer valid. |
|
Reminder |
If you select this option, a reminder displays after adding a reminder icon. You can enable or disable reminders using the Enable Reminders option in the Tools menu of the Activity Search window/Dashboard widget. |
|
Show time as |
This property applies to Appointments only. Select how to display the time for this activity on the Task Scheduler:
|
Note: The relationship between the Status and % Complete properties is automatically maintained. For example, setting Status to Completed automatically updates the % Complete value to 100.
Once all properties are configured, click Save and Close on the toolbar.
Activity Recurrence
Click the Recurrence button to set an activity as recurring and to establish the frequency.
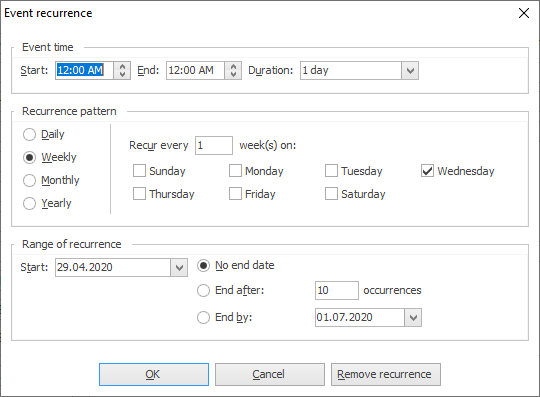
Configure the recurrence options and click OK to assign this to the task. If you are editing a task and no longer need this recurrence, click Remove recurrence to remove this from the calendar.