- Contents
- Index
- Search

Show results that include all search words
Setting Up Bank Feeds
Before you can begin using the Bank Feeds window to match transactions, you must set up Exo Business to allow the importing of bank feeds.
In order to connect to the Bank Feeds service, you will need:
- A my.MYOB account - your Business Partner must to contact MYOB’s administration team (accountsanz@myobadvanced.com) with your details to sign you up for an account.
- A Business Reference Number (BRN), which uniquely identifies an Exo Business databaseContact your Business Partner for the BRN for your database (they will be given it after your my.MYOB account is created).
To set up Exo Business for bank feeds, you must enter your BRN, then set up the individual bank accounts that you will be accessing via Bank Feeds. Finally, you should set up any rules that to apply to the process of matching bank feeds transactions.
Entering the Business Reference Number
Enter your BRN into the Business Reference Number field in the Company > Company Details section of Exo Business Configurator, then save.
Adding and Configuring Bank Accounts
You must add and configure the bank accounts that you will be receiving bank feeds from. Open the Bank Feeds window and click Manage Bank Accounts - the first time you do this, you are prompted to enter the login details for your my.MYOB account. For security reasons, this must be the specific login associated with this database. If you have another my.MYOB login not yet associated with this database, this will not work. After you log in, Exo Business retrieves details of your bank accounts, so you can set them up on the Setup Bank Feeds Account window:
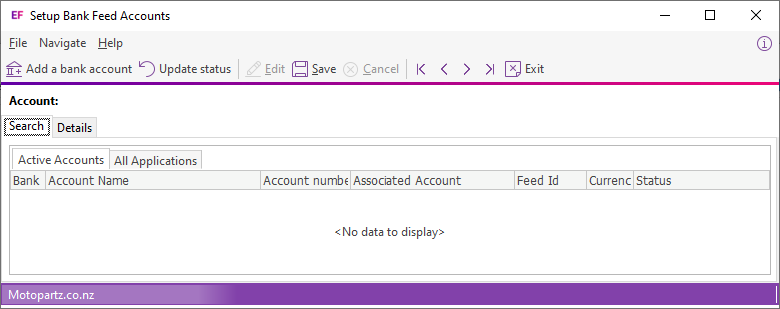
Note: The Active Accounts tab shows all accounts that are currently available for Bank Feeds. You can apply to have a new account added by clicking the Add a bank account button. Any accounts that are pending activation are displayed on the All Applications tab, where you can view their status.
The Active Accounts tab lists all bank accounts included in the bank feed. Initially, this tab will be empty - to add a new account:
-
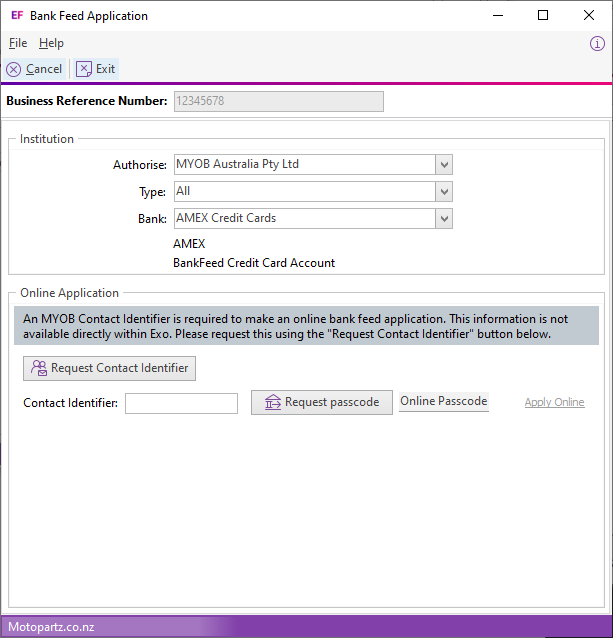
Click the Add a bank account toolbar button. The Bank Feed Application window opens:
-
Enter all details of the bank account. Select the country, type of institution and the institution's name, then enter the account details.
-
Click Submit Application. If the details you entered are valid, a confirmation message displays.
-
Click OK to save the Client Authority Form as a PDF document.
-
Print the document out, date and sign it, then send to the address at the top of the form.
Your application is processed in seven to 10 business days. Accounts that are pending activation display on the All Applications tab, where you can view their status. Once the application has been processed, the account displays on the Active Applications tab.
Assigning Active Accounts to a GL Account
You must assign active accounts a GL account:
-
Double-click on a bank account, or select it and click Edit. The Details tab displays.
-
Enter the GL account to assign to the bank account, or enter ? and press Tab to search for one.
-
Click Save.
Repeat these steps for each bank account, then close the Setup Bank Feeds Account window.
You can go back and edit bank account details by clicking the Manage Bank Accounts button , or configure them in Exo Business Configurator at Admin > Banks > Bank Feeds (Setup Accounts).