- Contents
- Index
- Search

Show results that include all search words
Contact Lists
You can set up contact lists to make it easier to send bulk communications to groups of Contacts.
Select Setup Contact Lists from the Setup menu to open a list of all Contact Lists.
Click New to create a Contact List or double click on a Contact List to edit it. You can also right-click on a Contact List and select Copy this List to create a list based on the existing one. The Details tab displays:
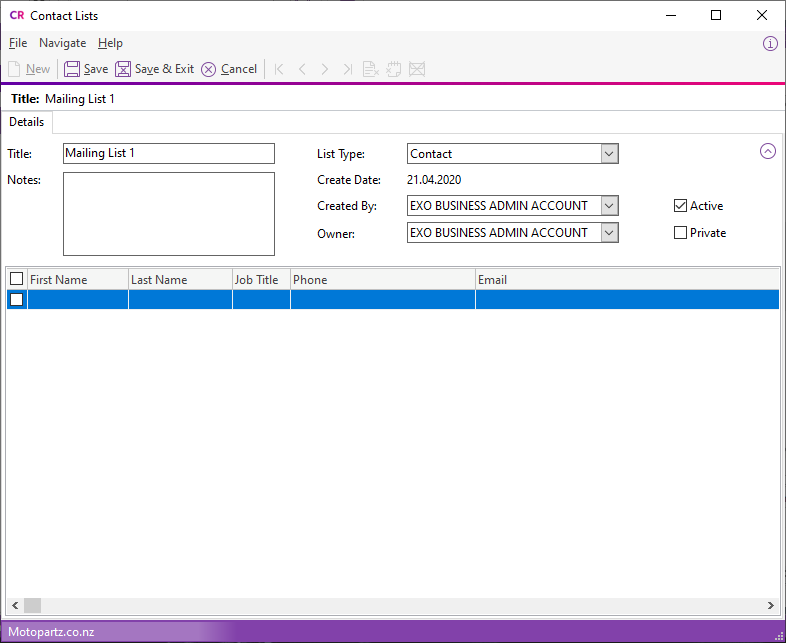
This tab contains these details:
|
Field |
Description |
|
Title |
The name of the list. |
|
Notes |
Enter additional information about the list in this field. |
|
List Type |
Select an option to determine which Contacts a user can choose when building the list on the List Building Criteria tab:
|
|
Create Date |
The date on which the list was created. This field is read only. |
|
Created By |
The name of the staff member who created the list. |
|
Owner |
The name of the staff member who is responsible for the list. |
|
Active |
If this option is not selected, the list is inactive. |
|
Private |
If this option is selected, the staff member can select the list from the Owner field. If it's not selected, all staff members can select and use the list. |
Click the  button to hide these details.
Contacts
The bottom half of the Details tab displays the details of all Contacts who have been added to the list. Contacts who were added manually are highlighted green. Contacts who were added from the List Building Criteria tab are not highlighted.
Double click on a Contact to open the Contacts window to view or edit its details.
Right click on the list to access these options:
 Delete Selected Contacts from List - removes
all selected Contacts in the list.
Delete Selected Contacts from List - removes
all selected Contacts in the list. Delete All Contacts from List - removes
all Contacts from the list.
Delete All Contacts from List - removes
all Contacts from the list. Selected Contacts Opt-Out of eMarketing - enables the Opt-Out
eMarketing option for the selected Contacts. If the Exclude
Opt-Out eMarketing option is selected on the List
Building Criteria tab, the Contacts are removed from the list
automatically.
Selected Contacts Opt-Out of eMarketing - enables the Opt-Out
eMarketing option for the selected Contacts. If the Exclude
Opt-Out eMarketing option is selected on the List
Building Criteria tab, the Contacts are removed from the list
automatically.
Adding Contacts to Contact Lists
Note: If you add a Contact to a list (by any method) or delete one from a list, Exo Business adds an entry to the History Notes tab of that Contact.
You can add contacts to a Contact List from the Contacts master screen. Select one or more Contacts, then right-click and select Selected Items > Add to Contact List.
You can also click the  button to add contacts on
the Contact Lists screen. In the search
window that opens, select one or more Contacts, then click Select & Close.
button to add contacts on
the Contact Lists screen. In the search
window that opens, select one or more Contacts, then click Select & Close.
To select and add multiple Contacts at once, you can build a list on the List Building Criteria tab on the Contact Lists window:
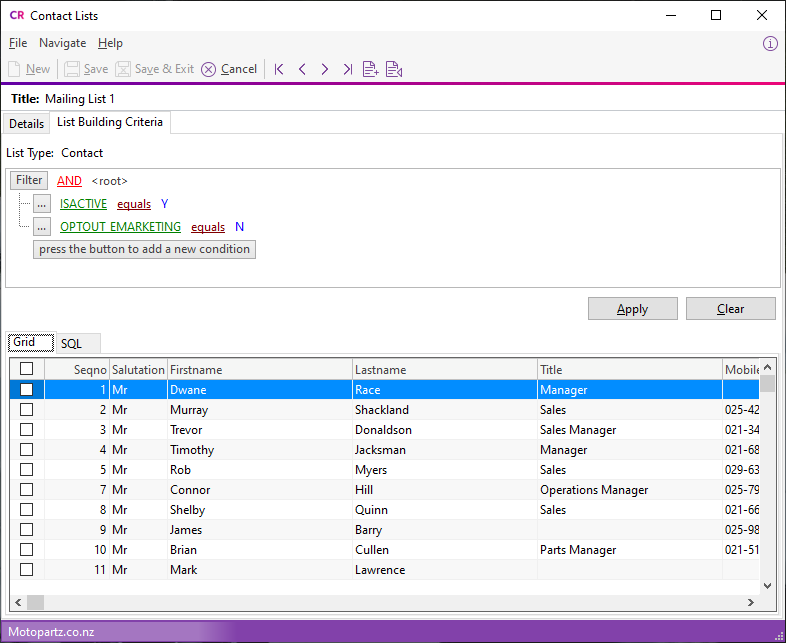
This tab contains an advanced search control. Set filters to specify which Contacts to include on the list, then click Apply to populate the Grid sub-tab with all Contacts that match the filters.
Note: You can double click on a Contact on the Grid sub-tab to open the Contacts window to view and/or edit its details.
Select all Contacts to add to the list, then right click on a Contact and select:
-
Add Selected Contact to List
 Add All Contacts to List
Note: You can right click on a Contact List on the Contact Lists search window and select Refresh this List to regenerate the list based on the existing list building criteria. This captures changes to Contacts that have been made since the list was last generated.
Selecting Contacts via a SQL Query
For a more advanced way to select Contacts, select the SQL sub-tab. This tab displays the SQL query used to populate the filters in the advanced search control:
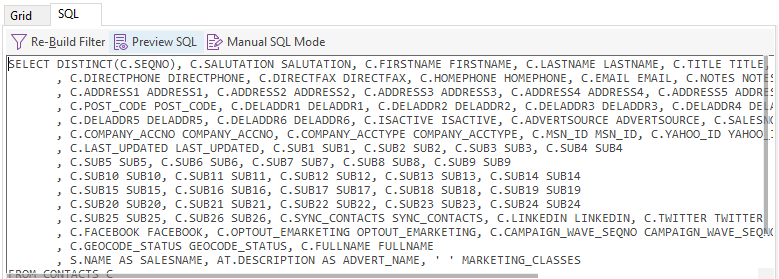
To customise the advanced search control:
- Edit the query on the SQL sub-tab. For example, you can remove unneeded filters from the advanced search control by deleting them from the query, or add new fields to filter by.
- Click Re-Build Filter.
Clicking the Preview SQL button on the SQL sub-tab opens a new window showing the SQL query that selects the Contacts in the Contact List:
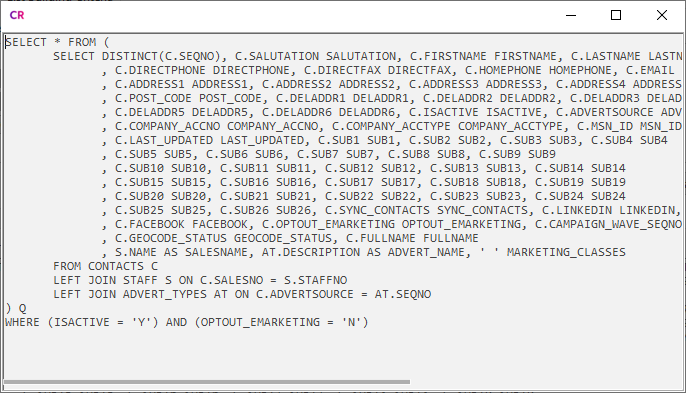
You can copy the from this window and paste it elsewhere — for example, into a Grid widget or another application.
Manual Mode
Clicking the Manual SQL Mode button on the SQL sub-tab enables you to edit the SQL statement.
Note: The advanced search control is removed from the tab if you change to Manual SQL Mode. When you put a Contact List is put into Manual SQL Mode and save it, you can't go back to using the advanced search.
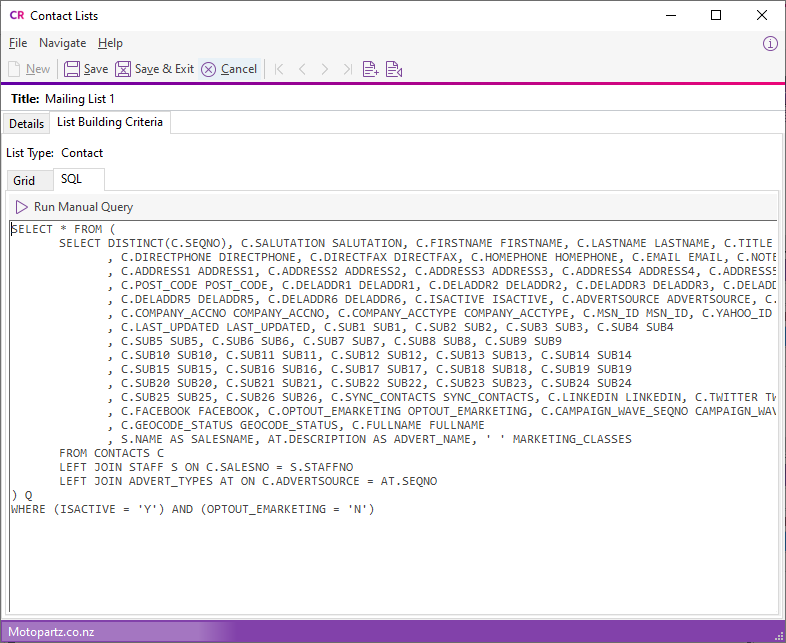
In Manual SQL Mode, enter a SQL statement to specify the Contacts to include in the Contact List and click Run Manual Query. The Grid sub-tab is populated with the results of the SQL statement.