- Contents
- Index
- Search

Show results that include all search words
General Ledger Report Batches
Reports > General Ledger Reports > Setup GL Report Batches
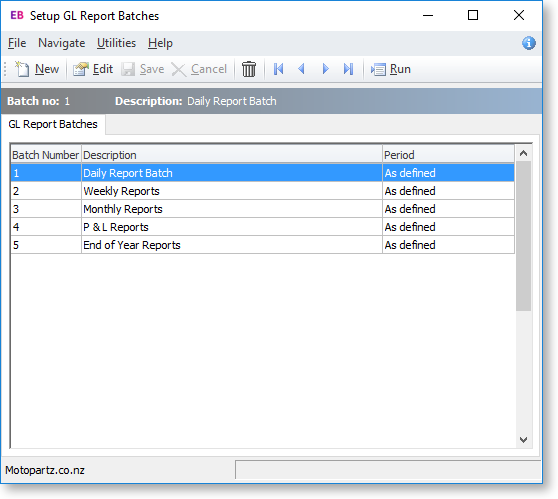
Use the GL Report Batches utility to group multiple GL Reports and schedule them to run at a specified time. A GL report batch could be a collection of different reports such as P&L and balance sheet, but can also include repetitions of the same report with different parameters. An example of this repetition could be multiple occurrences of P&L by branch report where there is one for each branch.
You can run batches from the user interface or from a command line prompt. The latter enables you to schedule a batch using an external scheduler such as the AT command provided with Microsoft Windows.
You can also direct GL reports to a file rather than printer. For example, you can save them as PDF files.
Setting Up GL Report Batches
Use the Setup GL Reports Batch utility to create GL report batches. You can run the utility from the main MYOB Exo Business menu or from the Configuration Assistant.
Note: There are three profile settings that should be set before creating GL report batches, as well as additional profiles that also apply to all batches:
-
Directory location for GL Report Batch runs (Computer-level General profile)
-
Save GL report batch files as CSV (Computer-level General profile)
-
GL Report Batch output device (Clarity Form profile)
To create a GL reports batch:
-
Start the utility by selecting Reports > General Ledger > Setup GL Report Batches.
Note: GL Report Batches can also be set up in Exo Business Configurator under Admin > General Ledger > GL Report Batches.
-
Exo Business displays the Search tab. You can edit or create a batch.
-
Double click a row or click Edit to edit a batch. Or click New to create a batch.
-
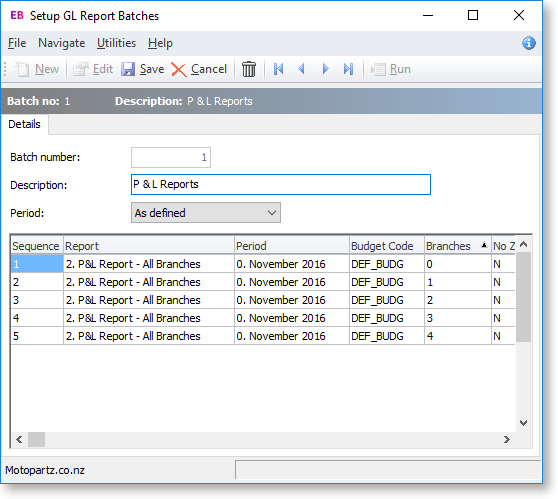
When creating or editing a GL Report Batch, the Details tab displays header information to identify the batch and lists the GL reports within the batch.
The grid on the Details tab lists the reports to be run, in a specific order, with specific parameters. Moving off the line or saving the batch validates each line.
Item
Description
Batch number
This field is set to the next available number but you can change it before saving.
Description
Enter a note about the purpose of the batch, or to distinguish it from other batches.
List seq
Enter a number to set or change the sequence in which the reports (with specific parameters) run. This is automatically set to the next available number.
Report
Select the GL Report to run from the dropdown list.
This is a required field.
Period
Select the period for which to run the report from the dropdown list.
This is a required field.
Budget code
Select the budget for which the report is to be run from the dropdown list.
This is not a required field, but you should set it for reports that use budget columns.
Branches
Leave this field blank if the report is run using the branch numbers defined in the report.
To override the branches set up in the report, either enter a comma-separated list of branch numbers or right click the grid and click Select Branch(es).
No Zero
Set this to Y to suppress reporting of lines that have only zero values.
Sub A/C
Set this to Y to report sub-accounts on separate lines. This defaults to Y if you use sub-accounts.
Clarity
Set this to Y to view the report using Clarity instead of the usual report viewer.
Save to File
Set this to Y to save the report to file instead of printing it.
Printer Name
Leave this field blank to use the default printer. Right click on the grid or press CTRL+P to select a printer.
Copies
If the report is not saved to file, this field determines the number of copies to print. The default is 1.
-
You can:
-
Insert a line by pressing the down arrow key.
-
Cancel an insert/edit by pressing the ESC key.
-
Delete a line by pressing CTRL+DELETE.
-
Copy a line by pressing CTRL+L. Use this to quickly set up a batch with reports using similar parameters — for example, a batch of P&L Reports, one for each branch. This copies the selected batch line, sets its list sequence to the next available number and selects it in the grid.
-
-
Click Save to save.
Additional Batch Tools
Use these functions to manage the batches.
Copy (Ctrl+O)
Copies the selected batch (including lines) to a specified Batch Number.
Merge (Ctrl+M)
Merges the selected batches into the first batch selected, resetting list sequences and deleting remaining batch headers.
Run (Ctrl+R)
Loads the Run GL Report Batch utility, which runs the batch.