- Contents
- Index
- Search

Show results that include all search words
Contact Lists
Contact lists can be set up to make it easier to send bulk communications to groups of Contacts.
Note: Video-based Help is available for this topic on the Exo Business Education Centre.
Select Setup Contact Lists from the Setup menu to open a list of all Contact Lists (if this menu option is not available, it must be added using Exo Business Config). Click New to create a new Contact List or double-click on an existing Contact List to edit it. You can also right-click on an existing Contact List and select Copy this List to create a new list based on the existing one. The Details tab is displayed:
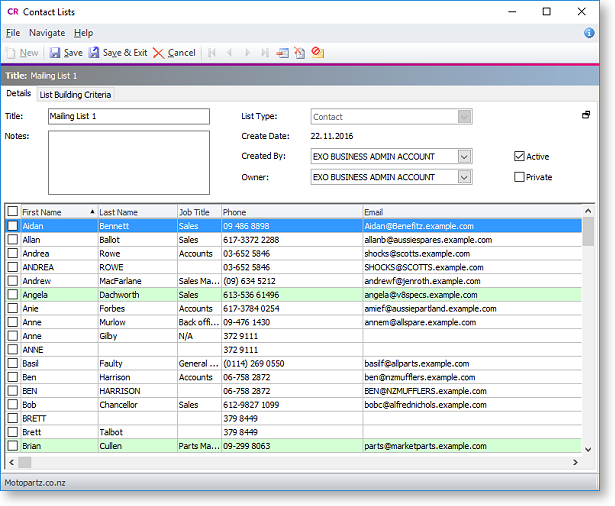
The Details tab of the Contact Lists window contains the following details:
|
Field |
Description |
|
Title |
An identifying name for the list. |
|
Notes |
Any notes giving extra information on the list can be entered in this field. |
|
List Type |
This property determines which Contacts will be available to choose from when building the list on the List Building Criteria tab. Choose from:
Note: Selecting an option other than "Contact" means that a JOIN operation will be performed between the CONTACTS table and the table that relates to the selected option. You can view the details of the JOIN on the SQL sub-tab. |
|
Create Date |
A read-only field displaying when the list was created. |
|
Created By |
The name of the Exo Business staff member who created the list. |
|
Owner |
The name of the Exo Business staff member who is responsible for the list. |
|
Active |
If this option is not ticked, the list will be considered inactive, and will not be available for selection. |
|
Private |
If this option is ticked, the list will only be available to the staff member select in the Owner field; if it is not ticked, all staff members will be able to select and use it. |
Click the  button to hide these details.
Contacts
The bottom half of the Details tab displays the details of all Contacts who have been added to the list. Contacts who were added manually are highlighted green; contacts who were added from the List Building Criteria tab are not highlighted.
Double-click on a Contact to open the Contacts window to view and/or edit its details.
Right-clicking on the list brings up the following options:
 Delete Selected Contacts from List - removes
all Contacts whose tick box is checked from the Contact List.
Delete Selected Contacts from List - removes
all Contacts whose tick box is checked from the Contact List. Delete All Contacts from List - removes
all Contacts from the Contact List.
Delete All Contacts from List - removes
all Contacts from the Contact List. Selected Contacts Opt-Out of eMarketing - enables the Opt-Out
eMarketing flag for the selected Contacts. If the Exclude
Opt-Out eMarketing option is ticked on the List Building Criteria
tab, the Contacts will be removed from the list automatically.
Selected Contacts Opt-Out of eMarketing - enables the Opt-Out
eMarketing flag for the selected Contacts. If the Exclude
Opt-Out eMarketing option is ticked on the List Building Criteria
tab, the Contacts will be removed from the list automatically.
These functions are also available as buttons on the Contact List window toolbar.
Adding Contacts to Contact Lists
Note: Whenever a Contact is added to a list (by any method) or deleted from one, an entry is added to the History Notes tab of that Contact.
Contacts can be added to a Contact List manually from the Contacts master screen. Tick the box(es) for one or more Contacts, then right-click and select Selected Items > Add to Contact List.
Contacts can also be added manually from the Details tab by clicking
the  button. This opens a search window - tick the box(es) for one or more
Contacts, then click Select & Close.
Contacts that are added to a list manually are highlighted green on the
Details tab. Manually added Contacts are not be affected if the Contact
List is refreshed, and can only be deleted manually.
button. This opens a search window - tick the box(es) for one or more
Contacts, then click Select & Close.
Contacts that are added to a list manually are highlighted green on the
Details tab. Manually added Contacts are not be affected if the Contact
List is refreshed, and can only be deleted manually.
To select and add many Contacts at once, you can build a list using the List Building Criteria tab on the Contact Lists window:
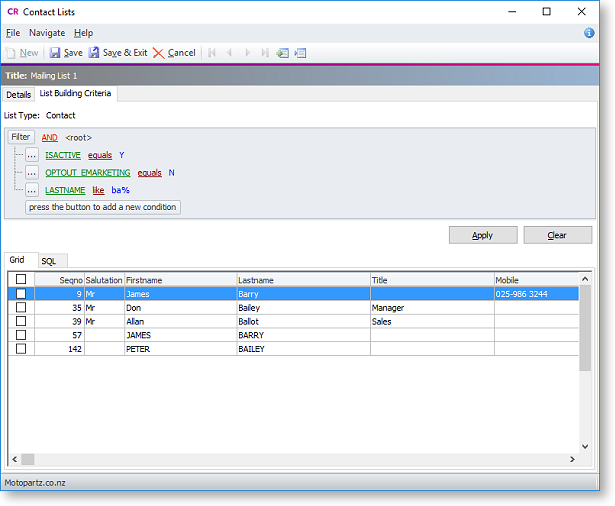
This tab contains an advanced search control. Set filters to specify which Contacts to include on the list, then click Apply to populate the Grid sub-tab with all Contacts that match the filters.
Note: You can double-click on a Contact on the Grid sub-tab to open the Contacts window to view and/or edit its details.
Tick the boxes for all Contacts you want to add to the list (or tick the box next to the grid header to select all Contacts), then right-click on a Contact and select one of the following options:
-
Add Selected Contact to List
 Add All Contacts to List
These functions are also available as buttons on the Contact List window toolbar.
Note: You can right-click on a Contact List on the Contact Lists search window and select Refresh this List to regenerate the list based on the existing list building criteria. This will capture any changes to Contacts that have been made since the list was last generated.
Selecting Contacts via a SQL Query
For a more advanced way to select Contacts, select the SQL sub-tab. This tab displays the SQL used to populate the filters in the advanced search control:
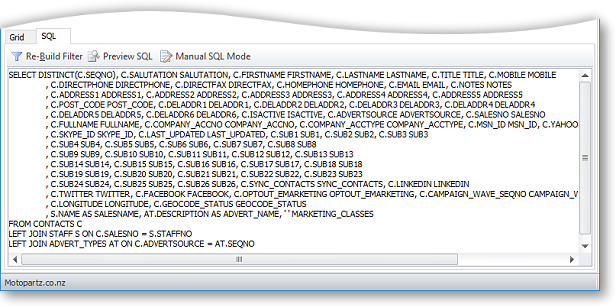
To customise the advanced search control:
- Edit the query on the SQL sub-tab. For example, you can remove unneeded filters from the advanced search control by deleting them from the query, or add new fields to filter by.
- Click Re-Build Filter.
You can now use the updated advanced search control to select a group of Contacts for the list.
Clicking the Preview SQL button on the SQL sub-tab opens a new window showing the full SQL query that is being used to select the Contacts in the Contact List:
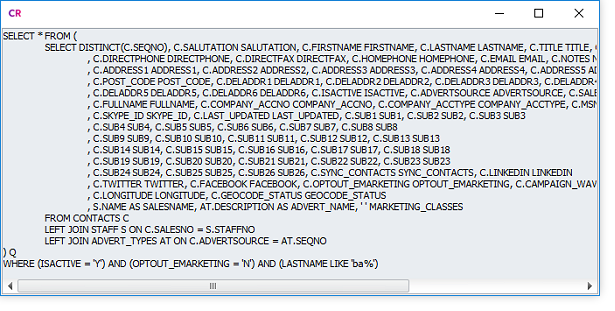
The query can be copied from this window and pasted elsewhere, e.g. into a Grid widget or another application.
Manual Mode
Clicking the Manual SQL Mode button on the SQL sub-tab changes the List Building Criteria tab into a mode where the SQL statement used to build the Contact List can be edited directly.
Note: Changing to Manual SQL Mode means that the advanced search control can no longer be used; the control disappears from the tab. This change cannot be undone - once a Contact List is put into Manual SQL Mode and saved, there is no way of going back to using the advanced search.
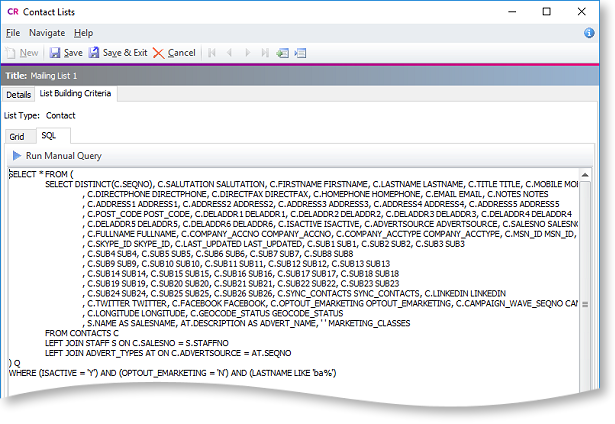
In Manual SQL Mode, enter a SQL statement to specify the Contacts to include in the Contact List and click Run Manual Query. The Grid sub-tab is populated with the results of the SQL statement.