- Contents
- Index
- Search

Show results that include all search words
Release Invoices for Payment
A ‘payable’ invoice is one that is not held and is due. The release of invoices can be done at an account level on the Creditors Accounts tab, or against specific transactions on the Transactions tab.
To release or not release ALL payable invoices on ALL displayed account, on the Creditor Accounts tab:
-
Click the Release All button on the toolbar to set ALL payable invoices on all displayed Creditor accounts to RELEASED.
-
Click the Release None button on the toolbar to set ALL payable invoices on all displayed Creditor accounts to NOT RELEASED.
To release or not release all the payable invoices on a specific Creditor, select the Creditor from the grid on the Creditor Accounts tab, then right-click to display options to release or hold all invoices for that account:
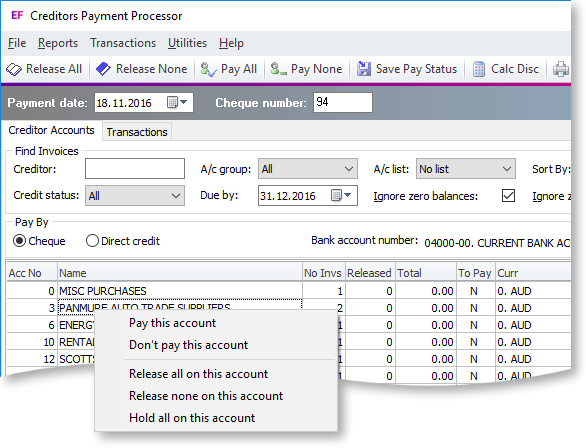
The options listed will affect all payable invoices for the selected account.
Controlling Individual Invoices
Alternatively, individual invoices for a specific account can be controlled.
-
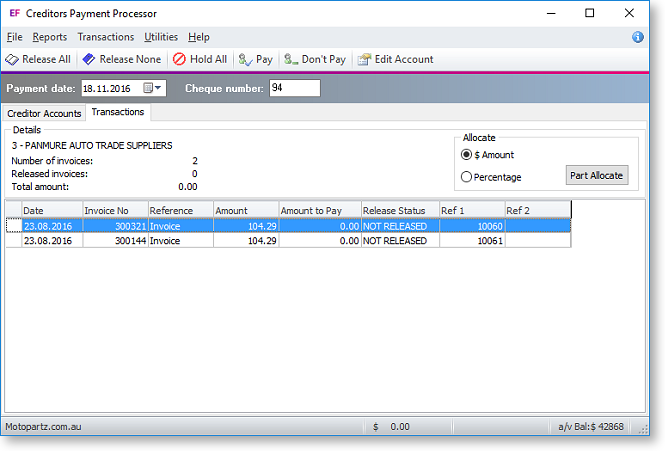
Double-click on a row and the system will display the invoices for the selected Creditor on the Transactions tab.
-
To release, not release or hold ALL payable invoices on the selected Creditor, on the transaction tab:
-
Click the Release All button on the toolbar to set ALL payable invoices on the selected Creditor to RELEASED.
-
Click the Release None button on the toolbar to set ALL payable invoices on the selected Creditor to NOT RELEASED.
-
Click the Hold All button on the toolbar to set ALL payable invoices on the selected Creditor to HELD
-
-
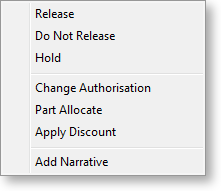
To change the release status of individual invoices, select the row, then either use the spacebar to move through the statuses, or right-click and select the required status from the pop-up menu.
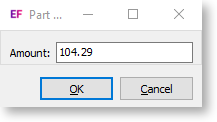
Paying Part of an Invoice
To part pay an invoice:
-
Select the invoice that is to be part-paid.
-
Right-click on the selected line, and chose the Part Allocate option, or choose $Amount or Percentage radio button, and click the Part Allocate button.
-
A prompt to enter the part allocation amount will be presented. Enter the dollar amount or the percentage that is to be paid, depending on the option selected.
-
Click OK. The transaction grid will be updated to reflect the allocation entered, e.g.

Change Authorisation
Invoices may be ‘un-authorised’ if the value exceeded the entry clerk’s authorisation limit. An invoice cannot be released until it has been authorised.
To change the authorisation:
Having selected the invoice, use F8 or right-click>Change Authorisation to toggle between authorised and un-authorised. The authorisation value on the grid will reflect the change.
Note: To use the Authorisation function in MYOB Exo Business, set the profile Enable authorisation on Creditors payments. The limits for each staff member must be set. In Exo Business Config, select Staff > Profile Assignment > Staff, and set the Cred. Invoice Auth Limit field on the Authority tab.
Other Functions on the Transaction Tab
The following functions are also available from the Transaction tab:
-
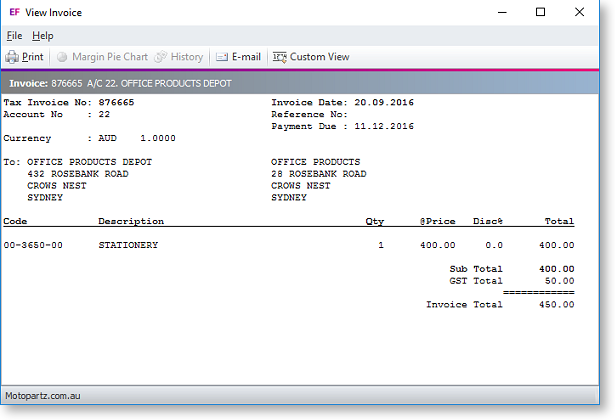
Double-click on a selected invoice to see the invoice details.
-
To edit the Creditor account details, click the Creditor Account button on the toolbar.
-
To set the Creditor To Pay to Yes, click the Pay button on the toolbar.
-
To set the Creditor To Pay to No, click the Don’t Pay button on the toolbar.
Once the status of individual invoices is complete, click on the Creditor Accounts tab to deal with the next Creditor account and/or complete the pay process.