- Contents
- Index
- Search

Show results that include all search words
Warranties
You can sell warranties in the Point of Sale module. You can associate multiple warranties with a single stock item, and also set a default warranty, such as the basic manufacturer’s warranty, for a stock item. When you sell a warrantable item in POS, you are automatically prompted with an opportunity to up-sell a warranty with the stock item.
Setting up warranties
There are four steps in setting up warranties in POS.
Turn on the warranty feature in POS
To enable the warranty feature, enable the profile setting Enable to track extended warranties in POS.
Create warranty lookup stock items
For each warranty you want to sell, you must first create a chargeable warranty stock item. This is the item sold when the warranty is selected at time of sale.
Create a new stock item in EXO Business, specifying the following details:
- Select "WARRANTY" for the item's Classification property.
- Tick the Lookup checkbox.
The price for the warranty comes from this stock item.
Set up warranties
Set up warranties in the EXO Business Configuration Assistant at Administration > Stock > Warranty.
These warranties define the possible links between warrantable stock items and the actual warranty stock items. For each warranty, you can configure:
- The Charge Stock Code, which specifies the warrant stock item that will be used to charge the customer for the warranty (as set up in step 2 above). Multiple warranties in the EXO Business Configuration Assistant may use a single warranty stock item if pricing etc is appropriate.
- The Primary and/or Secondary stock groups, which will be used to make the warranty available to a range of warrantable stock codes. Both may be defined, and either can be reset to "NO GROUP SELECTED" by clicking its wastebasket icon.
Make stock items warrantable
To make a stock item warrantable, locate the item in EXO Business, select the Details 2 tab of the Stock Item Details window and in the Warranty No field choose the warranty you want to make the default warranty for this stock item. This makes the item warrantable and identifies the default warranty. When you come to sell this stock item, the warranty you specify here will be the default in the Add Warranty window.
Selling a stock item with a warranty
When you sell a list of items containing one or more warrantable, an extra Sales Warranty window will appear in between selecting sales items and entering payment information:
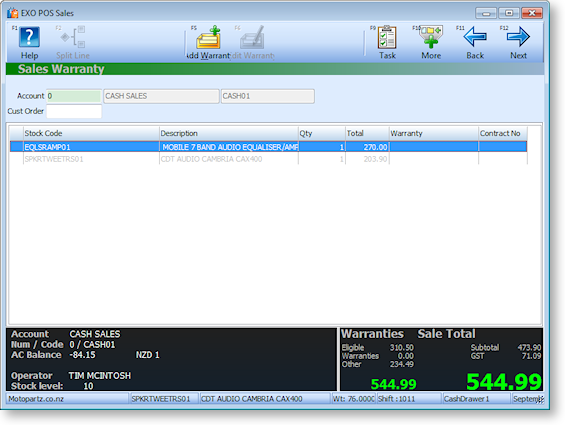
Warrantable items are listed in black font and non-warrantable items are listed in grey.
Tip: The non-warrantable items can be hidden or shown by pressing CLRL+F8 or selecting Filter from the More toolbar.
To add a warranty to a warrantable item:
-
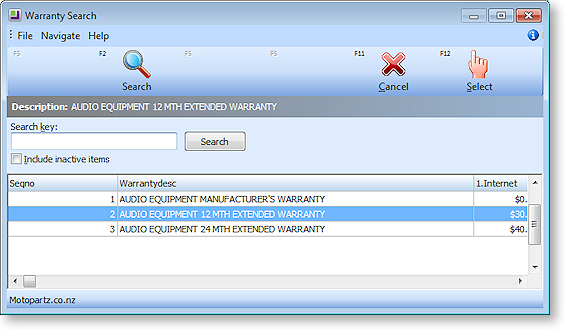
Highlight the warrantable item that you want to add a warranty to and click Add Warranty or press F5. The warranties that are available for this stock item are displayed, with the default warranty highlighted:
-
Select the required warranty. The Warranty Contract Number window is displayed:
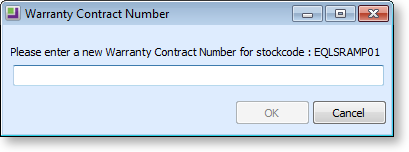
-
Enter the warranty contract number. This will typically be pre-printed on the warranty form completed on behalf of the customer. Up to 50 characters may entered. There is no validation or check for duplication on this number. Click OK.
The warranty is added to your sale, and the total information is updated.
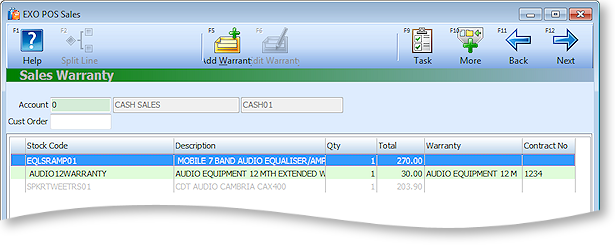
More than one warranty can be added to an item if required. If you proceed from the warranties screen using the Next button, then the system will check to see if you have any warrantable items for which warranties have not been entered and inform you if this is the case.
Note: The warranty number can be printed on the invoice if required by using Clarity to add the field DR_INVLINES.SERIALNO.
The warranty contract number may be edited by selecting the green warranty line and clicking Edit Warranty or pressing F6.
You can delete a warranty line as you would any other sales line. Deleting the line to which the warranty is attached will also delete the warranty line.