Eliminating Transactions
To eliminate transactions, go to Utilities > Eliminate Transactions.

The following functions can be performed:
-
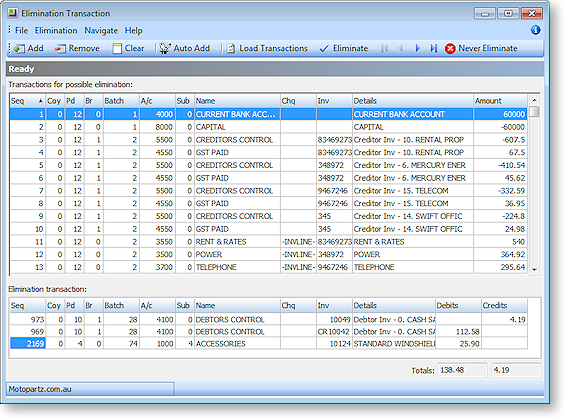
Clicking Load Transactions retrieves all GL transactions for the contra accounts (those accounts defined in > Setup> GL Contra Accounts). This will populate the upper half of the screen shows all transactions that were found for the contra accounts – these are the transactions for possible elimination.
-
Double-clicking a row in the top grid, or selecting it and clicking Add, transfers the transaction to the lower grid.
-
Clicking Remove clears the selected transactions out of the lower grid.
-
Clicking Clear clears all transactions out of the lower grid.
-
Clicking Auto Add transfers all transactions to the lower grid.
-
Clicking Never Eliminate flags a transaction to be never eliminated. You are prompted to confirm - click Yes, and this transaction will no longer be available for selection for elimination.
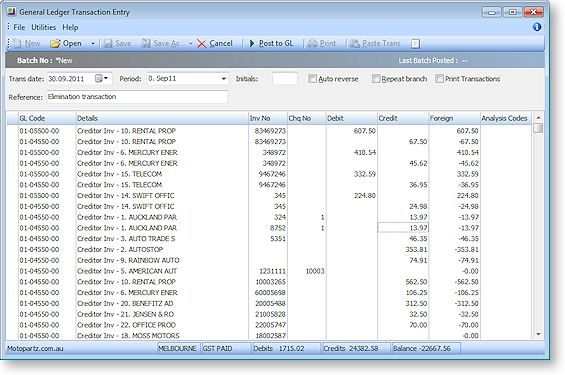
Once all transactions that you want to eliminate have been transferred to the lower grid, click Eliminate to creates a GL Journal to eliminate the selected transactions. A confirmation message appears - click Yes and the journal entry screen appears:

Click Post to GL to eliminate the transactions.
