- Contents
- Index
- Search

Display results with all search words
The Query Wizard
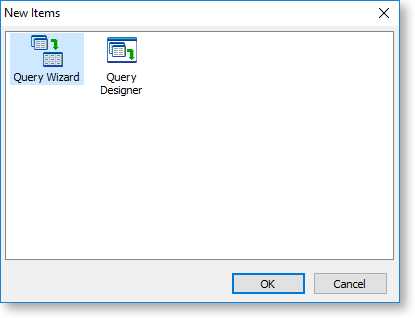
The Query Wizard steps you through the process of setting up a new data source. To create a new data source with the Query Wizard, select New from the File menu on the Data tab, then select Query Wizard from the window that appears.
Select Tables
The first screen of the Query Wizard lets you select the tables to include in the data source:
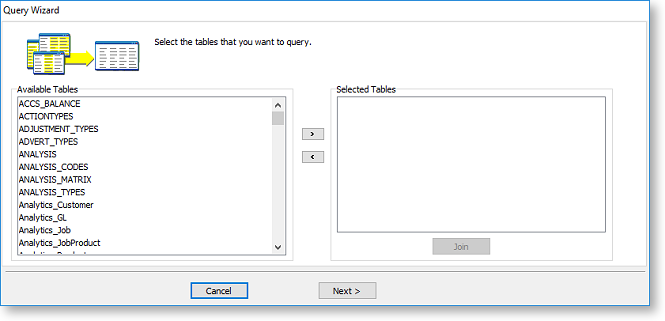
To add a table, double-click on it in the Available Tables pane, or select it and click the left arrow button. The table appears in the Selected Tables pane.
Note: Any views set up in the Exo Business database are also available for section here.
When you add a second or subsequent table to the Selected Tables section, the Join Table window appears so you can create a join between the new table and one of the existing tables:
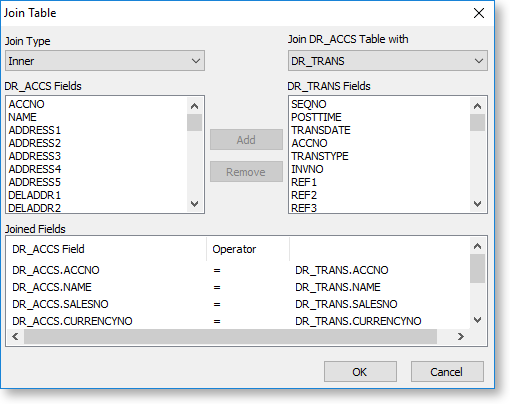
To create the join:
- Select the Join Type: Inner, Left Outer, Right Outer, or Full Outer.
- Use the Join Table with dropdown to select the table that the new table will be joined to. Only tables that are already part of the data source are available in the dropdown.
- Exo Clarity automatically adds joins between fields that have the same name in both tables. You can then add or remove joins as necessary:
- To add a new join, select a field from the Fields box on the left, select the field to join it to from the Fields box on the right, then click Add.
- To remove a join, highlight it in the Joined Fields section and click Remove.
- Click OK to create the join and close the Join Table window.
You can edit the join by selecting the joined table in the Selected Tables section and clicking the Join button.
Once you have added all tables, click Next to go to the next wizard screen.
Select Fields
The next wizard screen lets you select which fields from the table(s) you selected on the previous screen should be included in the data source. By including only a subset of the available fields, you can reduce the amount of data that has to be processed when the report is run.
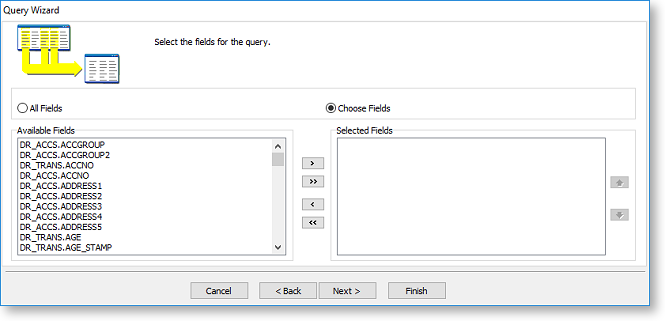
Either select the All Fields option, or select Choose Fields, then move fields between the Available Fields and Selected Fields sections using the following methods:
- Double-click on a field in the Available Fields section to move it to the Selected Fields section (and vice versa).
- Select one or more fields, then drag them from one section to the other. You can select multiple fields using the CTRL and SHIFT keys.
- Select one or more fields, then click the left and right arrow buttons to move them from one section to the other.
- Click the double arrow buttons to move all fields from one section to the other.
Once you have added all fields, click Next to go to the next wizard screen.
Add Calculations
The next wizard screen lets you add fields that perform basic mathematical calculations on the data.
Note: Advanced calculations are set up on the Exo Clarity Calc tab.
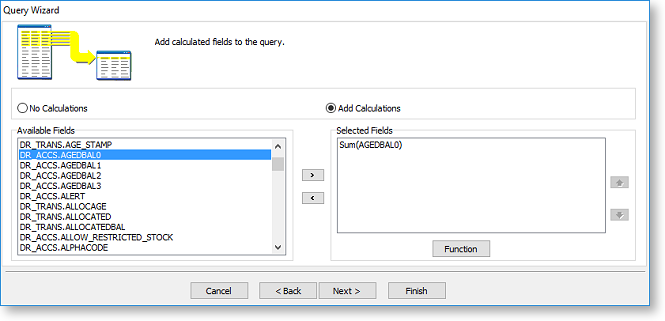
To add a calculation, select the Add Calculations option, then add a field to the Selected Fields section by double-clicking on it or selecting it and using the left arrow button. When a field is added, the Calculated Fields window opens, which lets you set up the calculation:
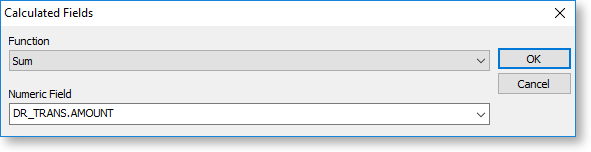
Select a calculation function to perform from the Functions dropdown. The following functions are available on this tab:
- Avg - Average the values in the selected field.
- Count - Return a count of the values in the selected field.
- Max - Return the maximum value out of the values in the selected field.
- Min - Return the maximum value out of the values in the selected field.
- Sum - Sum the values in the selected field.
You can change the field that the calculation is based on by selecting a different one from the Numeric Field dropdown. Click OK to add the calculated field.
Once you have finished adding calculated fields, click Next to go to the next wizard screen.
Add Groups
The next wizard screen lets you group the data in the data source by common field values.
Note: More advanced grouping options are available on the Groups window, which is available from the Design tab.
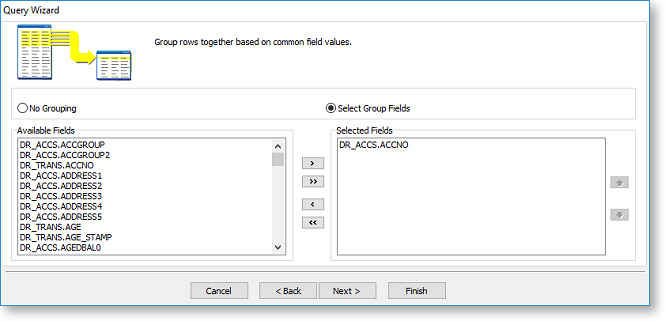
Either select the No Grouping option, or select Select Group Fields, then move fields between the Available Fields and Selected Fields sections using the following methods:
- Double-click on a field in the Available Fields section to move it to the Selected Fields section (and vice versa).
- Select one or more fields, then drag them from one section to the other. You can select multiple fields using the CTRL and SHIFT keys.
- Select one or more fields, then click the left and right arrow buttons to move them from one section to the other.
- Click the double arrow buttons to move all fields from one section to the other.
Once you have finished adding groups, click Next to go to the next wizard screen.
Add Search Criteria
The next wizard screen lets you perform searches on the data to narrow down the selected data so the data set is kept as small as possible.
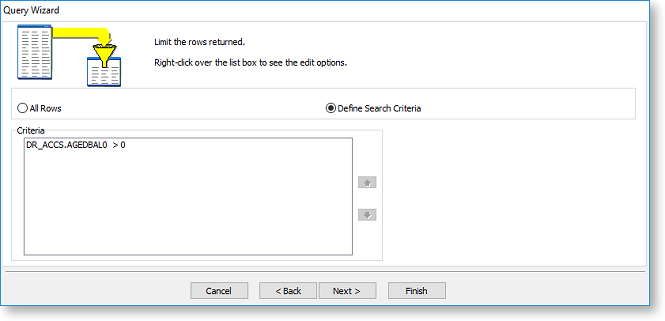
To add search criteria, select the Define Search Criteria option, then right-click on the Criteria section to add search criteria. The right-click menu offers the following options:
- Insert Criteria - adds new search criteria
- Insert OR - adds an OR operator between criteria
- Insert NOT - adds a NOT operator before the selected criteria
- Edit Criteria - edits the details of the selected criteria
- Remove - deletes the selected criteria
- Add Parentheses - adds "begin" and "end" statements around the selected criteria, so that you can group criteria together when they are evaluated.
- Remove Parentheses - removes any parentheses from around the selected criteria.
Selecting Insert Criteria or Edit Criteria opens the Search Criteria window, where you can set up the search:
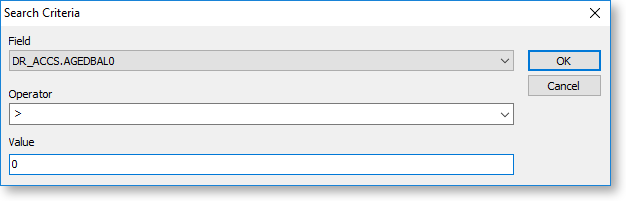
To set up the search:
- Select the field to search on from the Field dropdown.
- Select the search operator, e.g. less than, greater than or equal to, not equal to, from the Operator dropdown.
- Enter the search value into the Value field.
- Click OK.
Once you have finished adding search criteria, click Next to go to the next wizard screen.
Add Sorting
The next wizard screen lets you control how the data in the data source will be sorted.
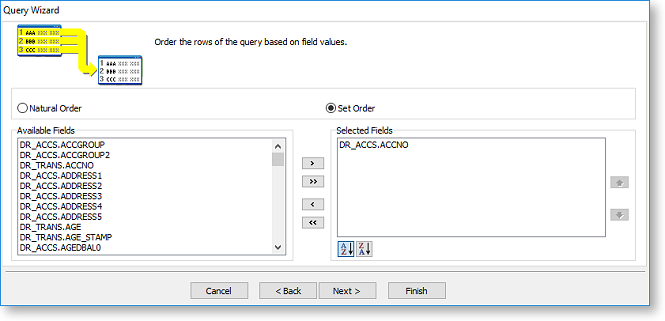
Either select the Natural Order option, or select Set Order, then move fields between the Available Fields and Selected Fields sections using the following methods:
- Double-click on a field in the Available Fields section to move it to the Selected Fields section (and vice versa).
- Select one or more fields, then drag them from one section to the other. You can select multiple fields using the CTRL and SHIFT keys.
- Select one or more fields, then click the left and right arrow buttons to move them from one section to the other.
- Click the double arrow buttons to move all fields from one section to the other.
Use the  buttons to specify whether data should be
sorted in ascending or descending order for each sort field.
buttons to specify whether data should be
sorted in ascending or descending order for each sort field.
Once you have finished adding sorting, click Next to go to the next wizard screen.
Name the Data Source and Finish
The final wizard screen lets you enter a name for the new data source.

Click Finish to create the new data source and perform one of the following actions:
- Return to data workspace - closes the wizard and returns to the Data tab.
- Preview the query - closes the wizard and displays a preview window showing the data that will be selected by the new data source.
- Modify the query's design - closes the wizard and opens the new data source in the Query Designer, where you can edit it further.
Once a data source has been added, it appears in its own pane on the Data tab. You can access the Query Designer to edit the data source using the toolbar buttons at the top of each pane. To remove a data source from the Data tab, right-click on it and select Delete.